If you sell a lot of retail, you will know how important it is to have a barcode scanner to increase efficiency and reduces mistakes when processing sales at your checkout.
TABLE OF CONTENTS
- Setup a barcode scanner
- Assign a barcode to an item in IBIS
- Setup a label printer
- Customise a label template for a thermal label printer
- How to print labels
Setup a barcode scanner
IBIS can be used in conjunction with barcode scanners. See our hardware recommendations for details. Using a scanner saves time as you no longer need to look up retail items at POS, you simply scan the item and IBIS does the rest. IBIS recommend barcode scanners with USB interface. Installing them is as simple as plugging them into a USB port while your computer is on. The computer should detect the new hardware and install it automatically.
A barcode scanner can be configured to automatically add a carriage return when scanned which is what we recommend. This must be configured using the manufacturer instructions for your specific model. You will need to scan a series of barcodes in order to change the settings for your model of scanner.
Assign a barcode to an item in IBIS
If your item already has a barcode, you can use the universal product code as the bar code by assigning the barcode to the item as follows:
- Open the Retail items screen under the Point of Sale menu.
- Highlight the item row.
- In the details area, place your cursor in the barcode field.
- Scan the barcode of the item - this should appear as a number in the barcode field.
- Save your changes.

Setup a label printer
You will need to specify your default label printer before you can print labels:
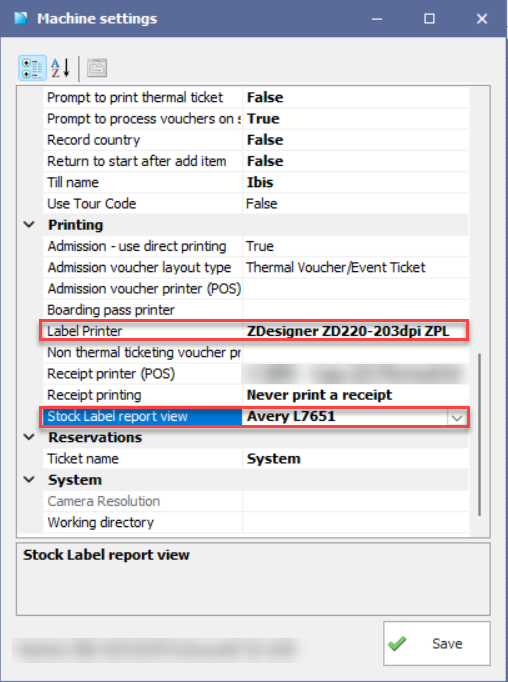
- Open the Machine settings screen under the System menu
- In the Printing section:
- Select your default Label printer from the list of printers available. Please follow your manufacturer instructions to set up your label printer.
- Select the stock label report view from the drop-down. E.g. default (see below if you are using a custom label template, as the name may be different).
- Save your changes.
For customers running version 25.14.00 or higher, we’ve updated the stock label printing design and no longer store label templates locally on your computer.

After updating, the first time you open the Print Label screen, your existing local custom label template will be copied into your IBIS system and set as the default label template.

If you were previously using an Avery L7651 template, please ensure your stock label report view name is set to Avery L7651 in the Machine Settings screen.
Customise a label template for a thermal label printer
Our default template is the Avery L7651 label, which contains 65 labels per A4 sheet and is designed for use with a laser printer.
If you have a thermal label printer, an IBIS technician will need to customise your label template based on the dimensions of your labels. Configuration fees will apply.
If you operate multiple retail locations within your IBIS system and use different labels/printers at each location, IBIS can set up multiple label templates for you. Each label template can then be assigned in the Machine Settings screen for the computers at that specific location.Please supply us with the dimensions of your labels in mm as per the following diagram so we can configure these for you:

How to print labels
You can print labels automatically from the Purchase screen after an order is completed. If you want to print labels at any other time, you can do this from the Print labels screen as follows:
- Open the Print Labels screen under the Stock menu.
- Enter the Item code and label count in the top line of the grid, then press either Enter or Tab. Note that IBIS will not let you print labels for inactive items.
- Repeat these steps until you have loaded all the labels that you want to print.
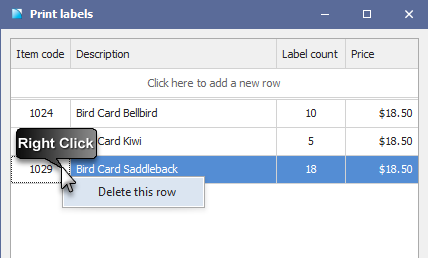
- If you wish to remove a row you have added accidentally, right-click the grey cell at the start of the row, then choose to delete selected row(s).
- Ensure you have loaded the labels into your printer before starting, then click Print.
Do NOT modify the sell price before printing as this will not change the price of the item when scanned at POS.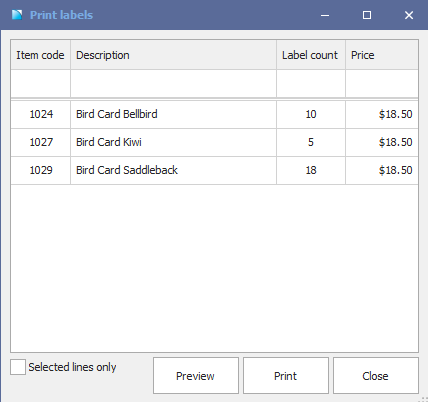
Hint: Only want to print some of the barcode labels you have generated automatically from the Purchase screen? Hold down the CTRL key when selecting (i.e. clicking) individual rows, then tick Selected lines only before pressing Preview or Print.