We are phasing out our Wordpress image plugin soon. We will be contacting all E-Commerce customers to transition to our new image manager. Learn more about how it works.
TABLE OF CONTENTS
- Setup and logging in for the first time
- View your image library
- Switching between grid view and list view
- Adding images for Items (stock and gift vouchers)
- Adding images for your home groups
- Adding images for your product and item groups
- Adding images for event tickets
- Searching for an image in your library
- Downloading an image to your computer
- Editing an image
- Deleting an Image
- Troubleshooting and FAQ's
Setup and logging in for the first time
An IBIS Technician will need to provide you with your initial login details to the IBIS image library (https://ibis-images.com/admin). Your user name is your specific IBIS Server code and the password is one you set yourself following the steps below:
- Once you have requested a login from us, you will receive an email to your nominated email address from Wordpress
- The email will contain a link to set your new password (you may need to check your spam or clutter folder for this email).
- Click the link and enter your new password in the New password box, then click Reset Password.
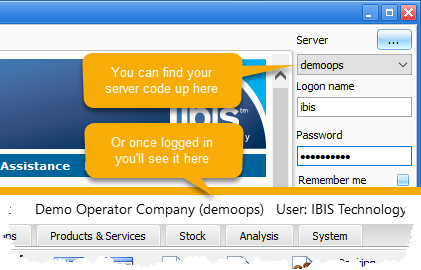
- You will be directed to the login page. Enter your Username (IBIS Server Code) and the password you just set. If you do not know your IBIS server code, you can find it by checking the IBIS application:
- Once you log in you will be directed to your user profile page where you can customise some aspects of your account. Your username cannot be changed.
View your image library
To see your current images you can either click directly on Media in the menu bar on the left or alternatively hover over Media and click Library on the popup menu.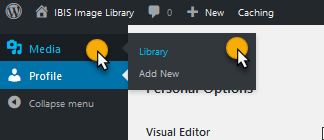
Switching between grid view and list view
The IBIS Image library has two different view types for you to browse your images, a Grid View and a List View. The Grid View will show you medium-small thumbnails with no details of the image until you select it whereas the List View will show you small thumbnails in a list style with the image info listed next to it. The Grid View is the default initial view when you log on and navigate to your library, however after your first log on the system will default to the last selected view before you logged out.
Each view has its advantages. The Grid View is great if you have a lot of images and you are able to identify the image you are trying to locate visually, the list view is better suited if you have fewer images to scroll through but will show you the image name next to the image for identification. In either view, you are able to search for your image by image name to narrow down your list of choices so meaningful image names are always helpful (see section Searching for an Image for more info).
Switching between List View and Grid View is easy once in your image library, just locate the two icons in the top left of the screen under the heading Media Library and click whichever view you require: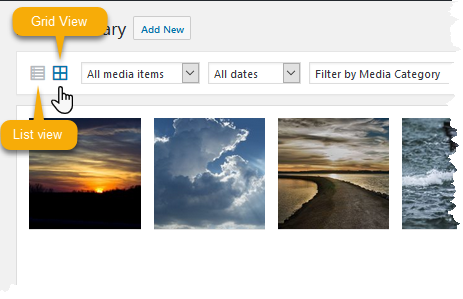
Adding images for Items (stock and gift vouchers)
You need to add images for all retail items and retail groups you sell online. For retail items you can upload multiple images per item, the IBIS E-Commerce website will create a slideshow of all images loaded for a particular retail item so you can display your items from every available angle!
- To add a new image navigate to your Image Library as above
- Click on Add New at the top, or alternatively hover over Media then click Add New so you arrive at the upload facility.
- Click on Select Files to navigate to the required picture on your computer, or alternatively drag and drop the image into the window.

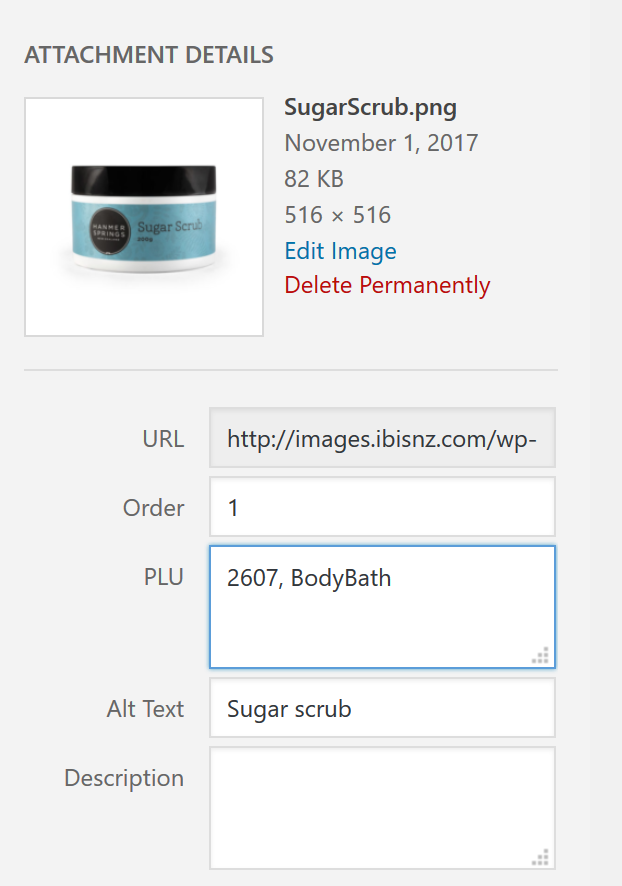
- Once the image has been uploaded, enter the following details:
Order: This field refers to the order your image will be displayed in. If you only have a single image for your retail item you will enter 1. If you have multiple images you will enter the order in which you want this image to appear in the image slideshow. The image with the lowest number (i.e. first in the list) will be the one that appears as the thumbnail for the item.
PLU: This should be the PLU code of the item you have uploaded or the Item Group code name (case sensitive). You can upload multiple images and enter the same PLU code for each one, or assign multiple PLU codes to an image by using a comma as the value separator (e.g. 1, 2, 3, 4, 5). The PLU code can be found in your Items screen within IBIS
Alt Text: This is the text which will appear when you hover the mouse over the image, it should be descriptive of the image. - Congratulations, you have uploaded an image! Click Add New to continue adding more images. Please read the Troubleshooting and FAQ's section if you cannot see the image on your e-commerce website straight away.
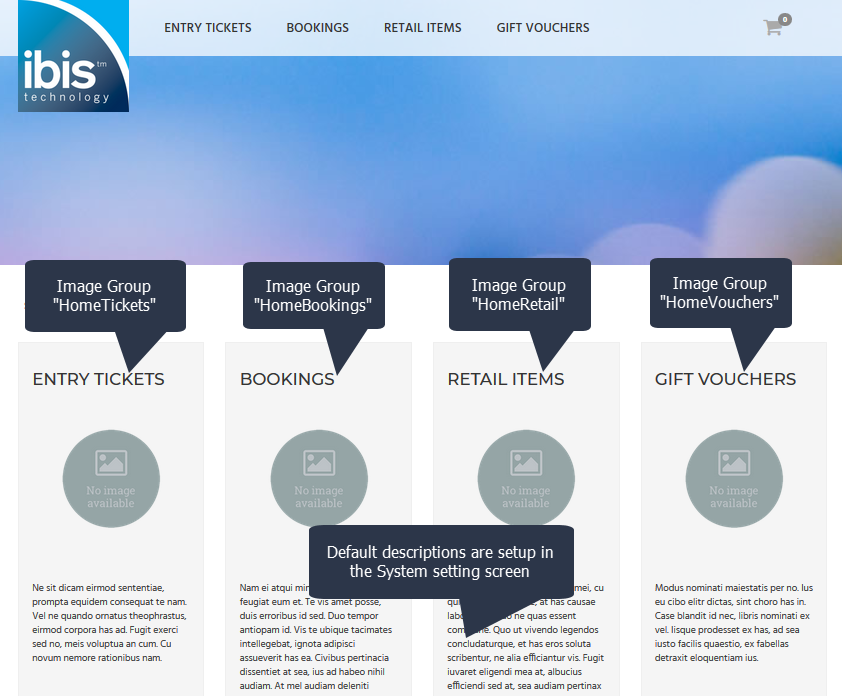
Adding images for your home groups
The IBIS E-commerce website requires images for the "home" groups. The default group name listed below must be specified in the "Plu" field of the image (see instructions above) you wish to appear as a default on the E-commerce home screen.
- Entry tickets: HomeTickets
- Bookings: HomeBookings
- Retail: HomeRetail
- Gift Vouchers: HomeVouchers
- Event Tickets: HomeEvents
- Appointments: HomeAppointments
Adding images for your product and item groups
Once products have been set up, you can now group them into Product Groups which will show online as well. You can add images to your various product groups to display on the web.
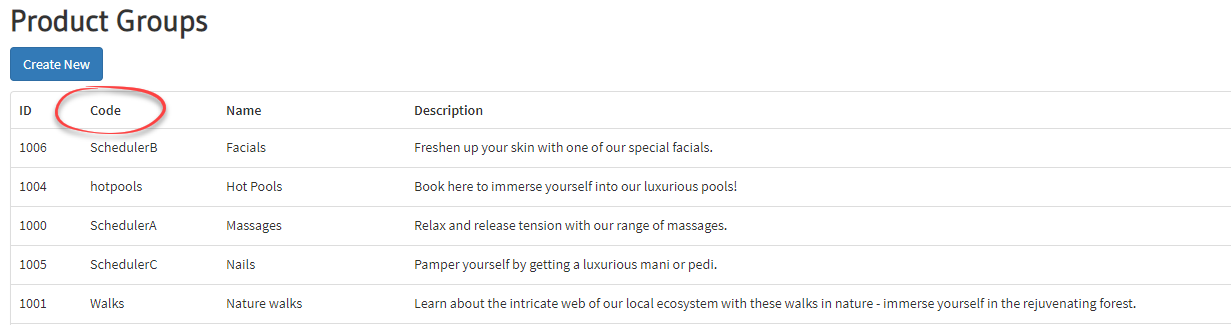
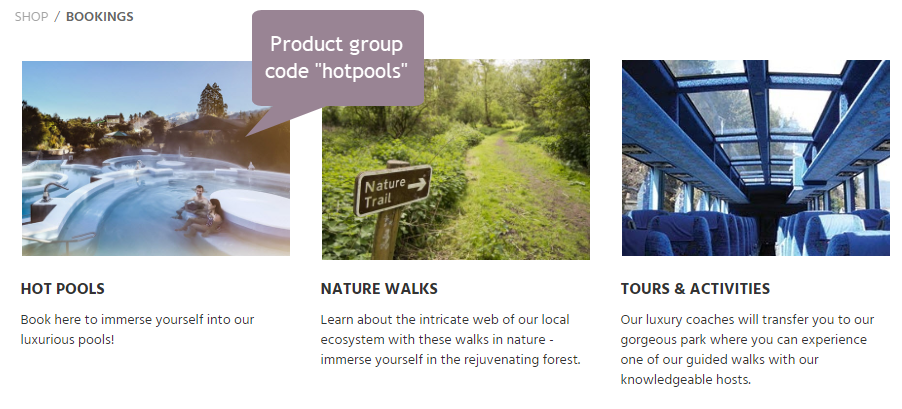
Reservation product groups (incl. appointments)
Enter "ProdGroup-groupcode" (case sensitive) e.g. "ProdGroup-Walks" in the PLU field on the image.
- You can find this through IBIS Online under Setup > Products > Product groups. From here you will see the code and that is what you use in the image library under the PLU section.
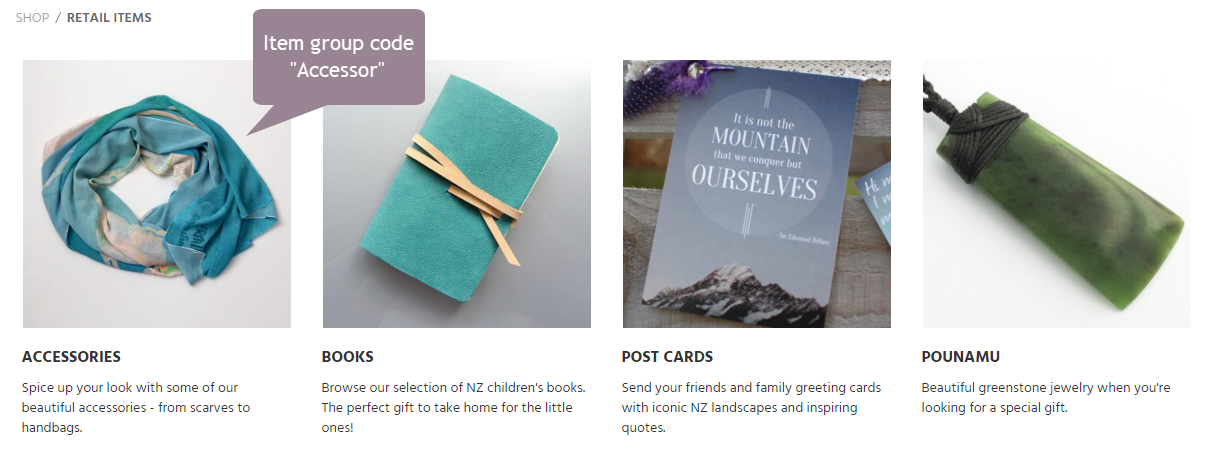
Item Groups (stock, admission or gift vouchers)
Enter your group code (case sensitive) e.g. "Accessor" in the PLU field on the image.
- You can find this through IBIS Online under Setup > System > Item groups. From here you will see the code and that is what you use in the image library under the PLU section.

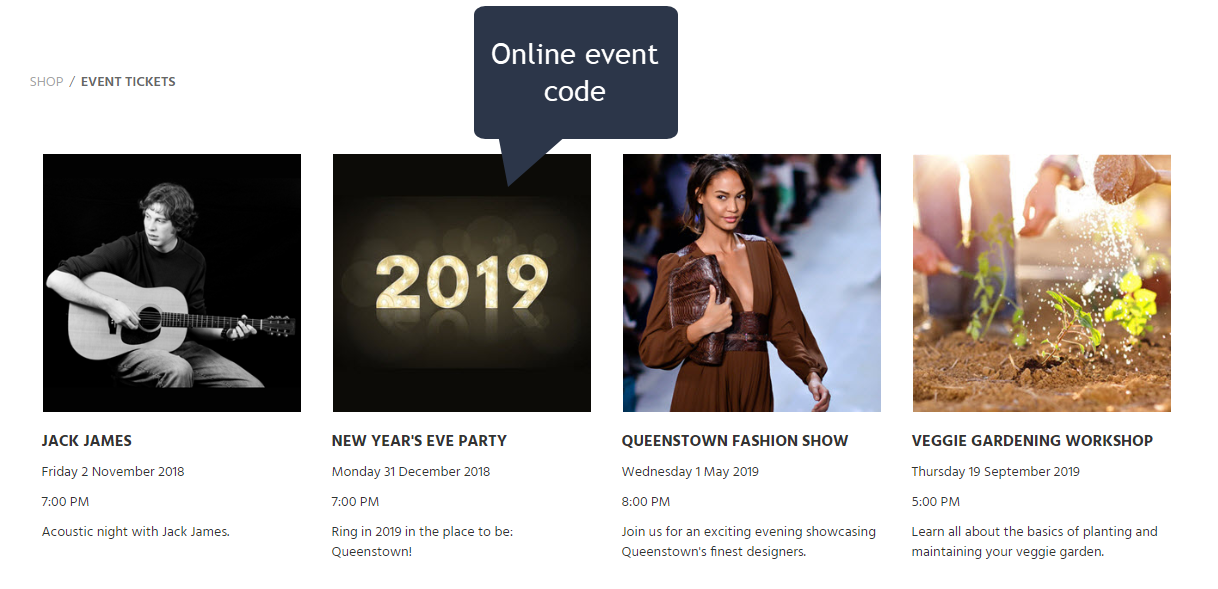
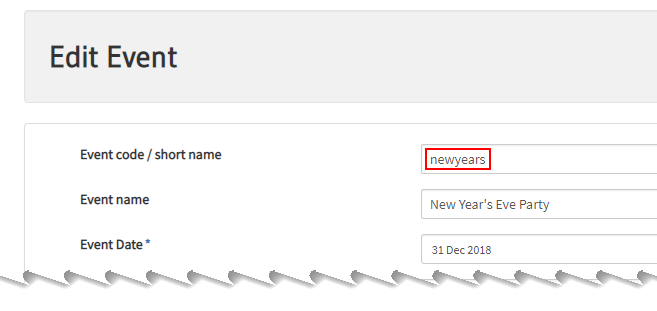
Adding images for event tickets
If you are using the Event Tickets module, each event you sell online will need an image. The online event code specified on your event setup page is needed to make the image appear on your E-Commerce website by entering that code in the "PLU" field as described above. You can find your event codes on IBIS Online in Setup > Products > Events.
Searching for an image in your library
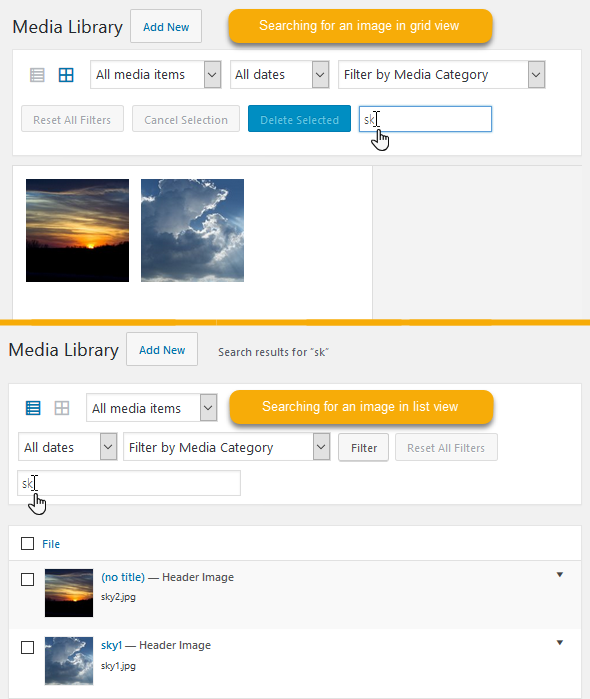
To search for an image in your library you will need to know the name of the image (the file name). You can search for an image in both Grid View and List View. The search is based around a partial match of the text you enter so will bring up any image files with your test in the file name, for example entering 'post' will bring up 'postcard', 'poster', 'postage stamp', 'compost' etc.
- Navigate to your image library using the instructions above
- Locate the Search text box (it will be on the top row and will contain Search media items...).
- Click into the box and begin entering your search string (in Grid View the found images will update with each letter you enter, in List View you will need to hit enter when you have entered your search string)
Downloading an image to your computer
If you are editing or planning on deleting an image you may wish to ensure you have a copy of your image saved on your hard drive beforehand. You can use the image manager to download a copy of any images you have previously uploaded. To do this:
- Follow the above instructions to access your image library
- Click on the List View option to view your images in list view
- Locate the image you wish to download and either click on the image itself or hover over and click Edit when it appears to the right side of the image
- The image will now be open at its maximum size, to download it simply right-click anywhere on the image and select Save Image As
- Navigate to the folder you wish to save it into on your hard drive
- If you wish to change the name of your file when saving you can do so at this point
- Once done, click Save to save the image
Editing an image
There are a few edit functions you can use within the website to crop, resize or flip/rotate your image.
- Follow the above instructions to access your image library
- Click on the image you wish to edit so the image appears highlighted with a tick in the corner and click Edit Image on the right side, or alternatively hover over the image until you see a pencil icon in the upper left corner and click this to be taken to the edit page:

- Note that if you click to select an incorrect image you can deselect it by either clicking again to remove the tick, or click on the Cancel Selection button at the top of the screen
- Once the image appears in edit mode, you can amend any details about the image (order, plu code, alt text)
- If you wish to amend the image itself rather than the details, click the Edit Image button located at the base of the picture
- This will launch the edit screen - the options available to flip and rotate the images are detailed below:

- To crop the image begin by clicking in the upper left most corner of your new size selection, then holding the left mouse button drag the cursor to draw a box around the part of the image you wish to crop. Once you have the selection box drawn you can drag the corners or sides of the box to fine-tune your selection. On the right side of the screen you will also see a section labeled Image Crop. Within here you can specify the exact dimensions you want to select (under Selection) or alternatively specify the Aspect Ratio of your selection - for example 4:3, or 16:9. Once you have the selection box in the right place, click the crop button which will now be active in the upper left corner:

- You will also see a section marked Scale Image, this will allow you to resize the image. It retains the ratio of your original image, so if you specify the width it will calculate the height automatically
- Once you have made any changes you need to, click on the button marked Save underneath the bottom left corner of the image
- At any point you can cancel out of edit mode by clicking Cancel which is located just to the left of the Save button underneath the bottom left corner of the image
Deleting an Image
- Navigate to your Image Library as above
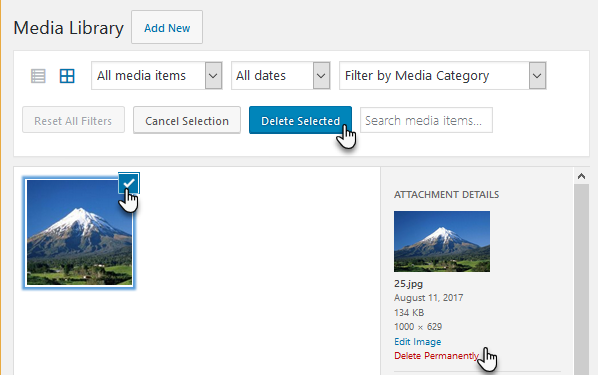
- Click on the image or images you wish to delete so you see a blue tick in the upper right corner
- Click Delete Selected on the top row, or Delete Permanently (cannot be undone) on the right side of the screen (in red text)
Troubleshooting and FAQ's
I tried uploading an image but got the message: ImageName.jpg exceeds the maximum upload size for this site.
The image files you upload can be a maximum of 2MB each. Anything above that will cause the upload to fail so you will need to resize your image before attempting to upload again. It's important to note that the size of the file doesn't necessarily refer to the height/width of the image but to the overall capacity of the file itself, so making the image itself shorter or narrower can reduce the overall capacity of the file but in some cases this won't be the best solution. There are a few things you can try, if either the height or width of your file is over 1200px, try resizing id down to 1200px to start with. You should be able to do this in some of the more basic graphics packages (such as Paint), and ensuring you 'Constrain Proportions' or 'Retain Aspect Ratio' will automatically calculate the other dimensions of the image. If this still doesn't reduce it to below 2MB you could try saving as a different file type (we recommend using Portable Network Graphics files - extension .png). Again you should be able to do this in a basic graphics package. Finally if neither of those options work you may need to reduce the resolution of the image (you may need to consult a graphic designer for this part, IBIS is unable to assist you with this option).
I uploaded an image called postcard.png but now when I look in my library it shows as postcard-1.png. What gives?
Your images are stored in a central database. Only you have access to your images however you may find that your image is renamed due to another image you don't have access to being called the same. This is nothing to worry about as the image slideshow works with the PLU Code you store in the Caption box rather than the name of the image itself.
I uploaded an image but it's not showing on my website?
The E-commerce website uses cookies to load images faster making the site more user friendly. These cookies store the image location info for 24 hours before they are automatically refreshed. This means that any newly loaded images won't show until the existing cookie expires unless you manually clear your cookies. You can manually clear the cooking from your browser by entering your IBIS Ecommerce website url followed by /cart/resetcache - E.g. https://demo.ibisnz.com/cart/resetcache