
The Resource planner helps you organise your daily operations by assigning bookings to resources, such as boats, buses, or guides, and generating manifests for each one.
TABLE OF CONTENTS
- Screen overview
- Before you start
- Create & manage resources
- Allocate bookings
- Manifesting
- Customise the display
Screen overview
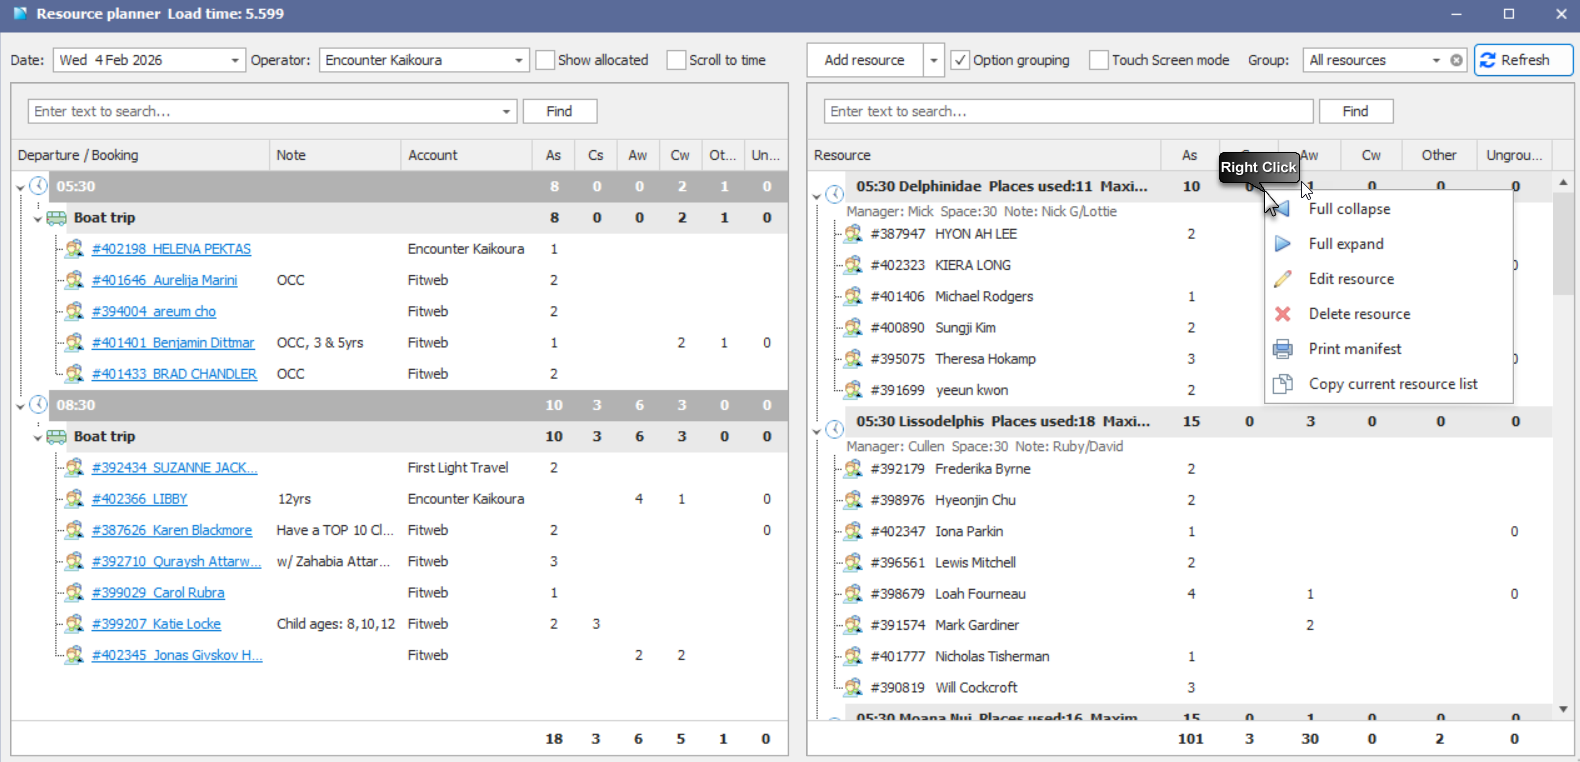
The Resource planner is divided into two panels:
Left panel: Displays bookings grouped by service departure time
Right panel: Displays available resources
Key features
Drag and drop bookings from the left panel onto available resources
Filter bookings by Operator and filter resources by Resource group
Right-click on resources for additional actions (e.g. print manifest, copy resource list)
Enable Touch screen mode to increase row height for easier interaction
Search box allows you to quickly filter the screen to find a specific booking.
- Double-click to open bookings in Itinerary screen
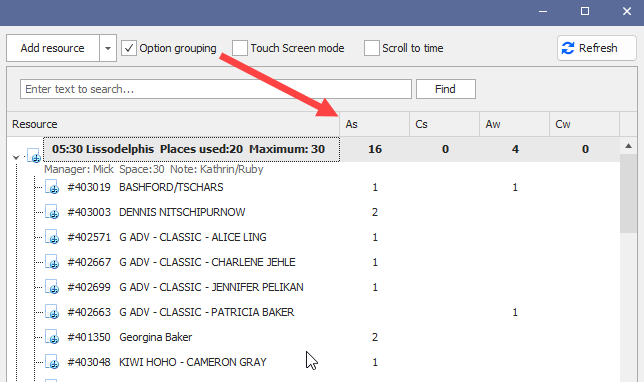
Option grouping allows you to consolidate price options together to make the screen layout simpler.
Bookings with outstanding balances will show in red as a visual indication of customers who need to pay.
Before you start
To use the Resource planner, ensure the following setup is completed:
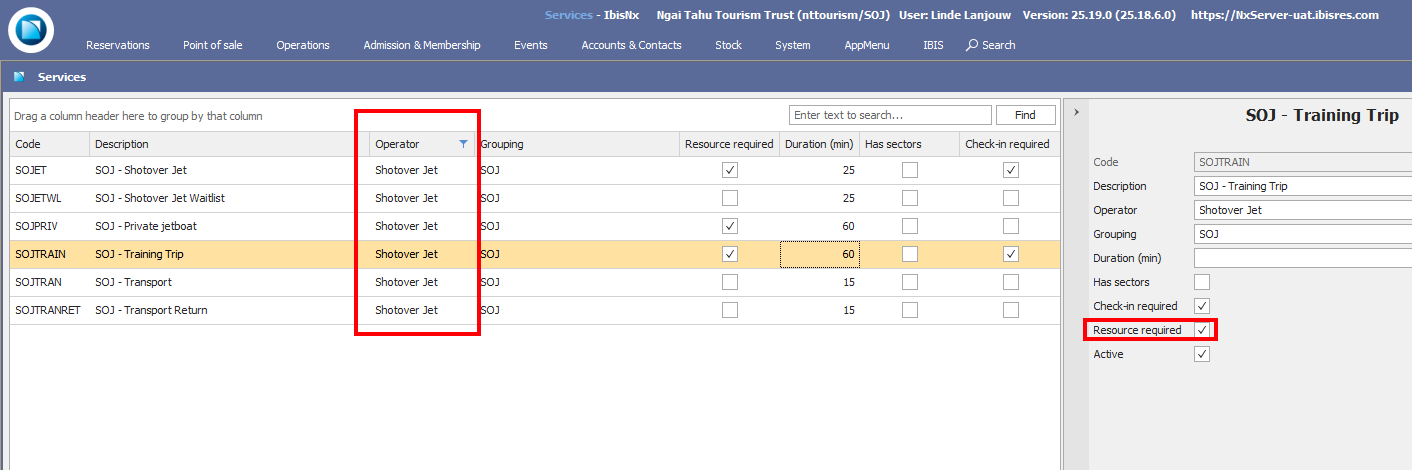
For Services to show in the screen, the services must have:
An Operator assigned
The Resource required checkbox enabled
- Managers must be setup in the Staff screen. A manager is a guide, driver, skipper, etc.
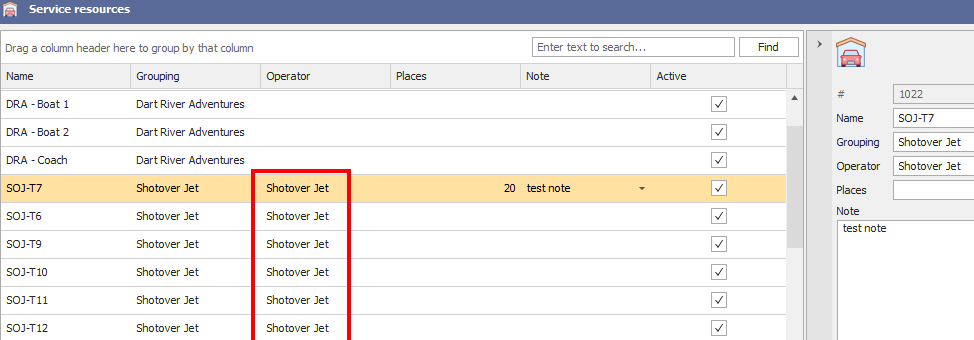
Resources must be created in the Service resource screen and have:
An Operator assigned to allow for correct filtering.
Number of places set (recommended)
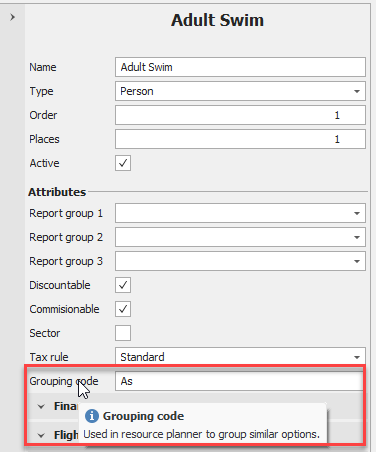
- Price options (optional) can be organised into a grouping code to make the Resource planner screen layout easier to read.
Create & manage resources
Add a resource
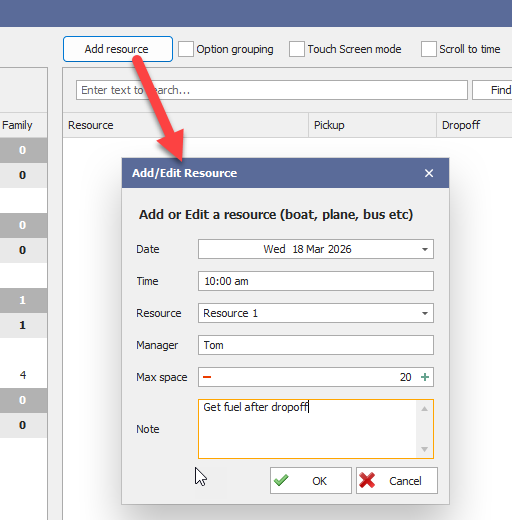
Click Add resource
Enter the resource details (e.g. date, resource, manager, capacity, notes)
Click OK, the new resource will appear in the right-hand panel.
Edit a resource
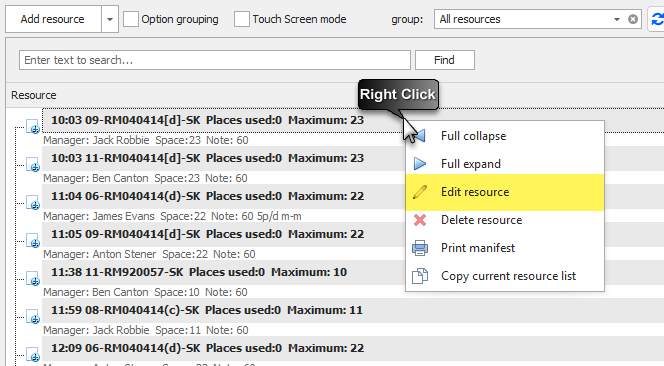
Right-click on the resource
Select Edit resource
Update the required fields
Click OK to save your changes
Delete a resource
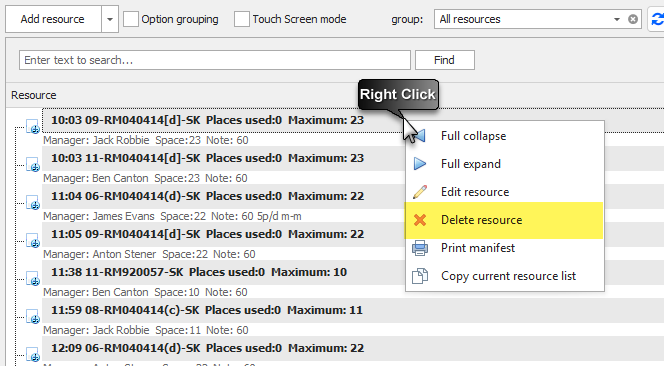
Right-click on the resource
Select Delete resource
Click Refresh to see your change appear.
Copy resource list to a date range
There is a drop list function under the Add resource button that allows you to quickly copy a resource list from a selected date. If you wish to copy a resource list over a range of dates, follow these steps:
Open the day you wish to copy.
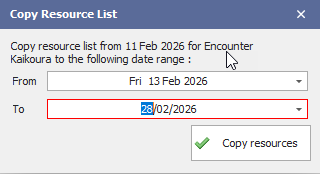
Right-click on any resource header, then select Copy current resource list
Select the start and end dates you want to apply it to, then click Copy resources.
We do not recommend copying resource lists too far in advance. Once copied, there is no bulk delete function if you want to make changes.
Allocate bookings
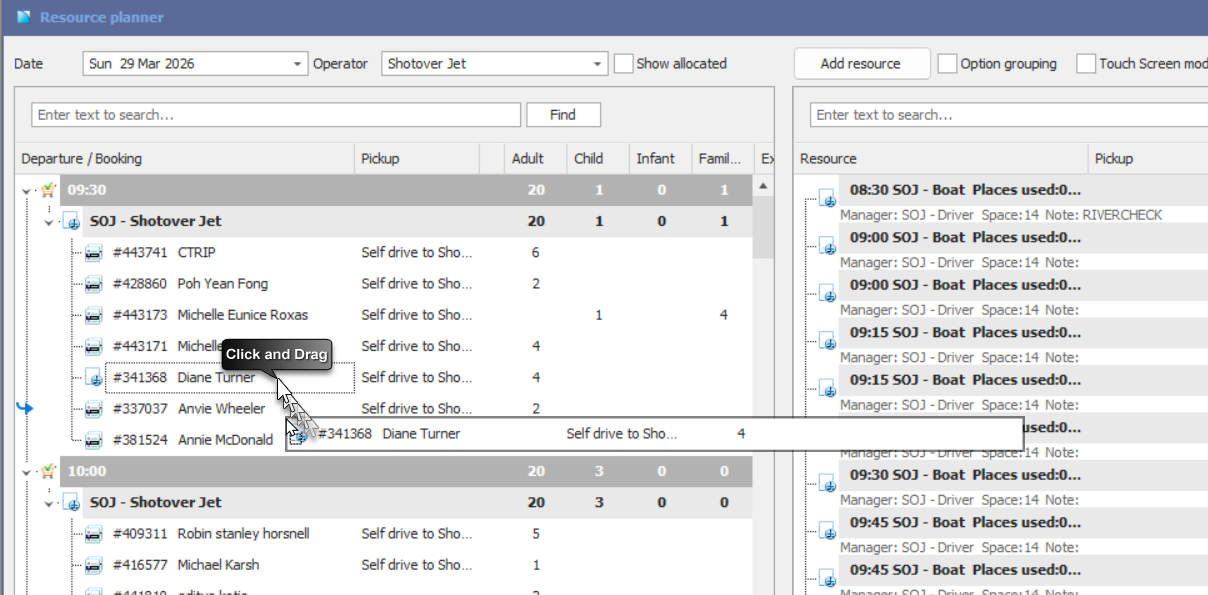
Assign a booking to a resource
- Locate the booking in the left panel.
- Left-click to select the row, then drag it to the resource on the right.
- Drop it onto the resource in the right panel.
Tip: To assign multiple bookings to the same resource at once, hold CTRL and click to select multiple rows, then drag and drop them together.

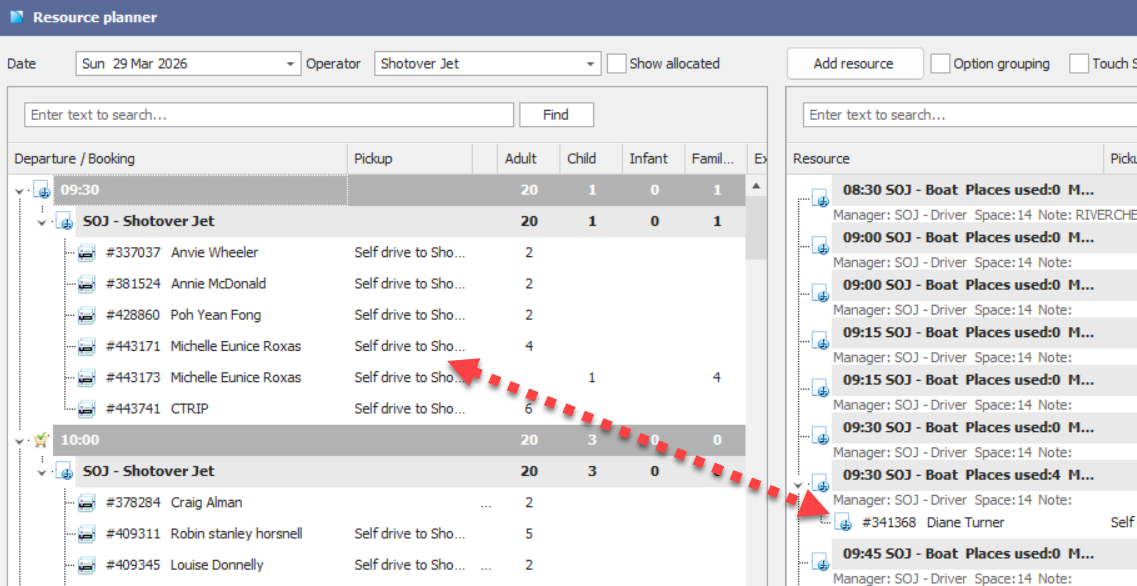
Hint: Tick the Show allocated box to see bookings already placed on to resources (the booking name and number will show in grey after they have been allocated).
Move a booking to a different resource
Click and drag the booking from one resource to another
Remove a booking from a resource
Drag the booking back to the left panel
It will automatically return to its original departure time group
Resource capacity tracking
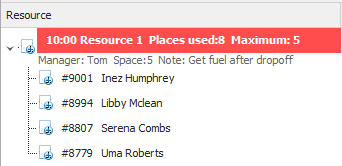
When bookings are assigned to a resource, the system automatically totals the number of passengers.
Overcapacity alert
If the total exceeds the resource’s maximum capacity, the resource will turn red
This indicates that action is required (e.g. reassign bookings or add another resource)
Manifesting
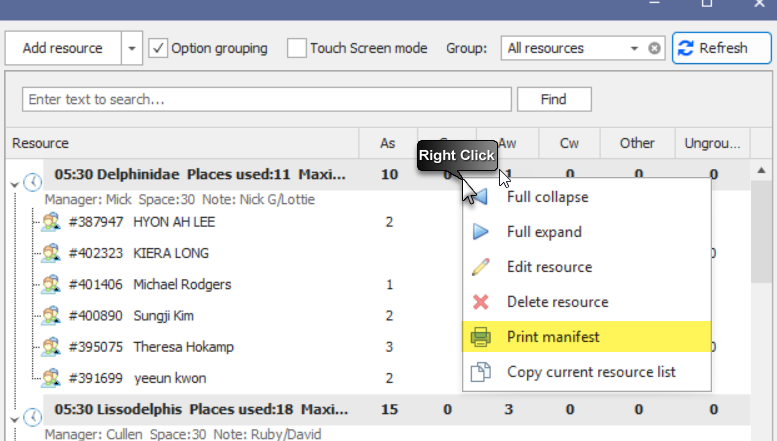
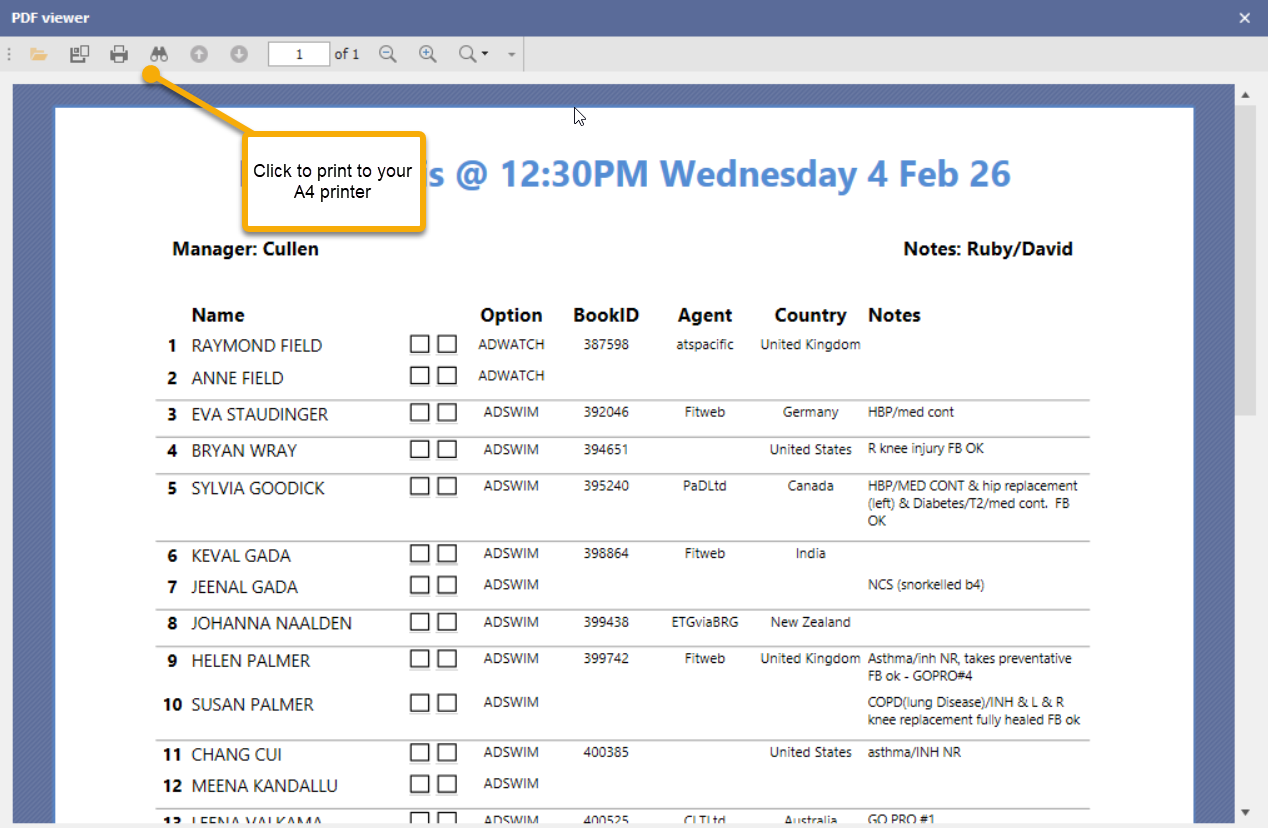
You can generate a manifest for each resource once bookings have been assigned.
Right-click on a resource
Select Print manifest (the only manifest option currently available is Resource pax manifest)
The Resource pax manifest includes:
Resource details - including Manager name and resource note
A list of all passengers that have checked in on a booking (a visual link break between unique reservations)
The option type, and check-in note set for each person
A sum of passenger option type counts
Customise the display
Option grouping
You can group price options to simplify the booking display. E.g. “Adult” and “Senior” can be grouped under Adult.
To set this up, configure a Grouping code in the Price options screen. Once set up, you can then enable the Option grouping field on the Resource planner screen to reduce the number of options displayed.
Show/hide additional fields in the Resource planner
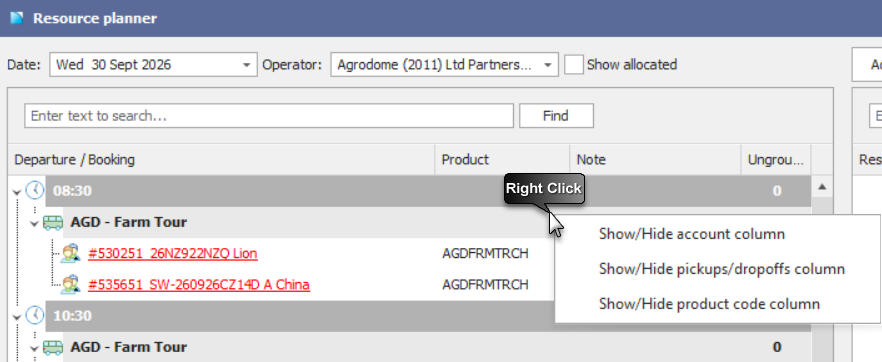
You can customise your Resource planner screen and choose to show/hide some columns if they are not required for your resource management needs. Optional display fields include:
- Pickup/dropoff
- Account
- Product code
To add these fields to the view, right click on the unallocated resource Time or name, and choose from the list:
To save these columns in your default screen view, left click on the IBIS icon in the top left of the screen, and choose Save defaults.
Touch screen mode
The touch screen mode will expand the width of rows so you can more easily use the Resource planner with your fingers. At this time, printing a manifest, editing resources or copying a resource must be done using a mouse as right-click functions are required.