
An appointment product is a type of reservation-based product that requires both a staff member and a resource (room) to be available. Each appointment is limited to a single customer per booking, making it ideal for services such as beauty treatments and massage sessions.
This article covers reservation management functions available in the Appointments screen and processes specific to appointment bookings. For a broader overview of booking management within the Itinerary screen, refer to the Itinerary Screen Processes article.
TABLE OF CONTENTS
- Appointments screen overview
- Search for an appointment
- View booking details
- View cancelled bookings
- Make an appointment booking
- Edit appointment bookings
- Change the status of a Scheduler booking
- Pay for an appointment
Appointments screen overview
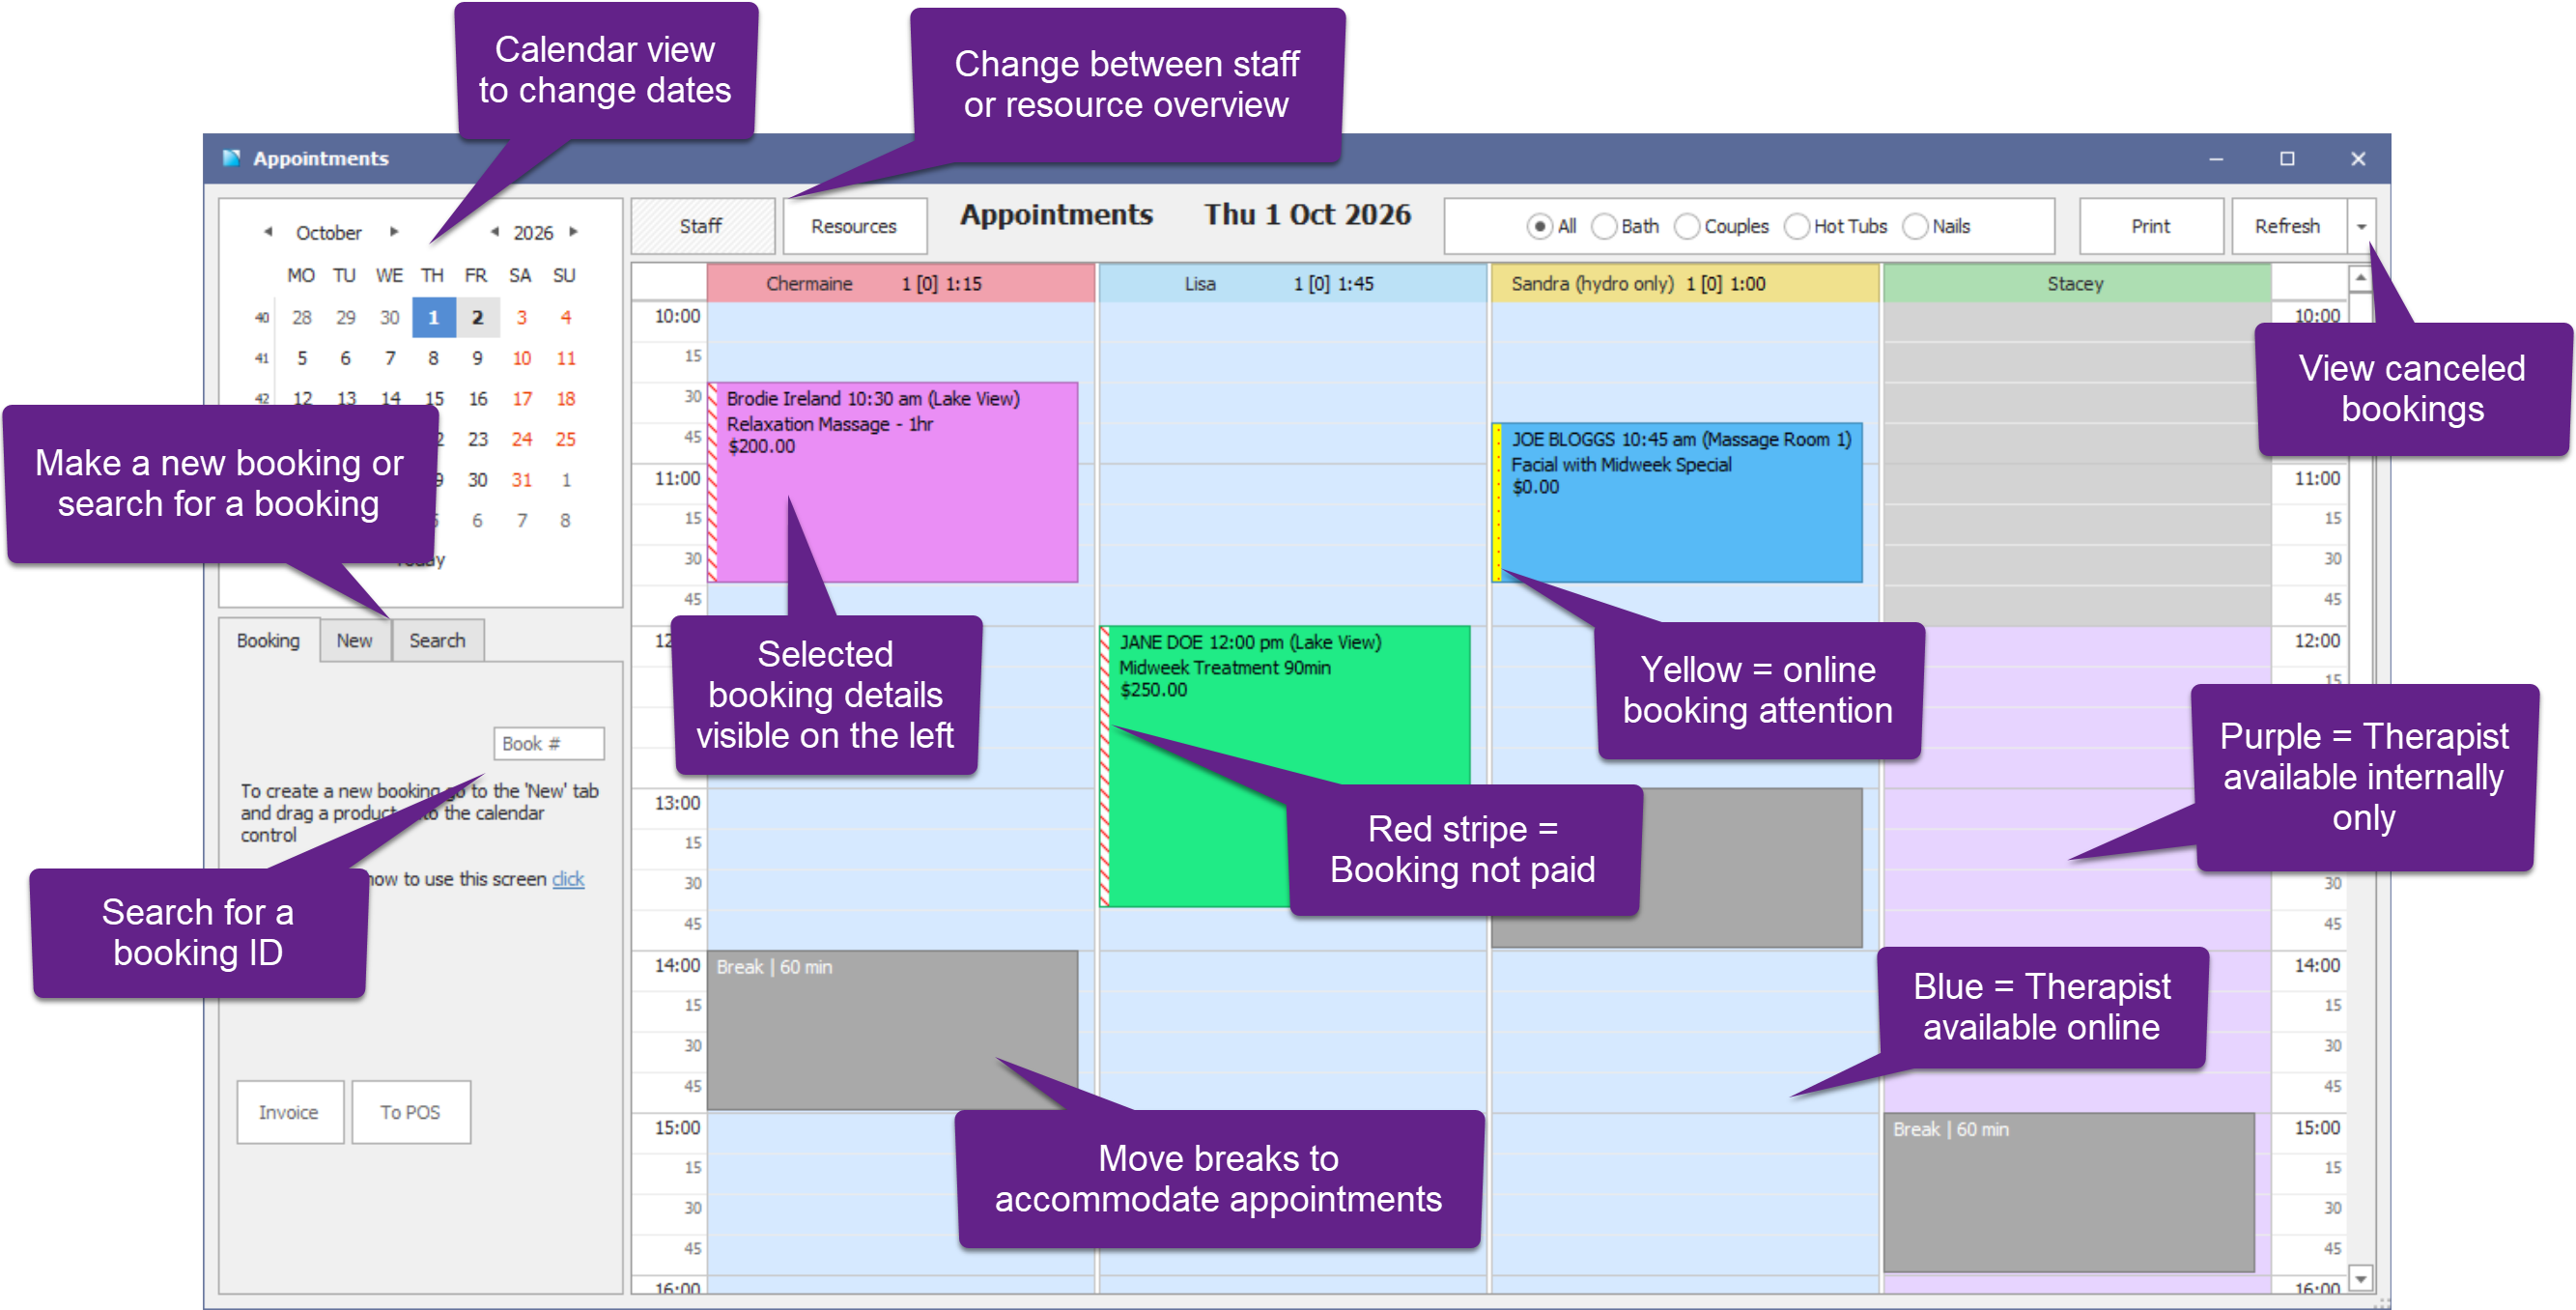
The Appointments screen provides an operational overview of your appointment bookings for a selected day. From this screen, you can view therapist and resource availability at a glance, make new bookings, and manage existing reservations.
Search for an appointment
You can search for a booking in the Appointments screen.
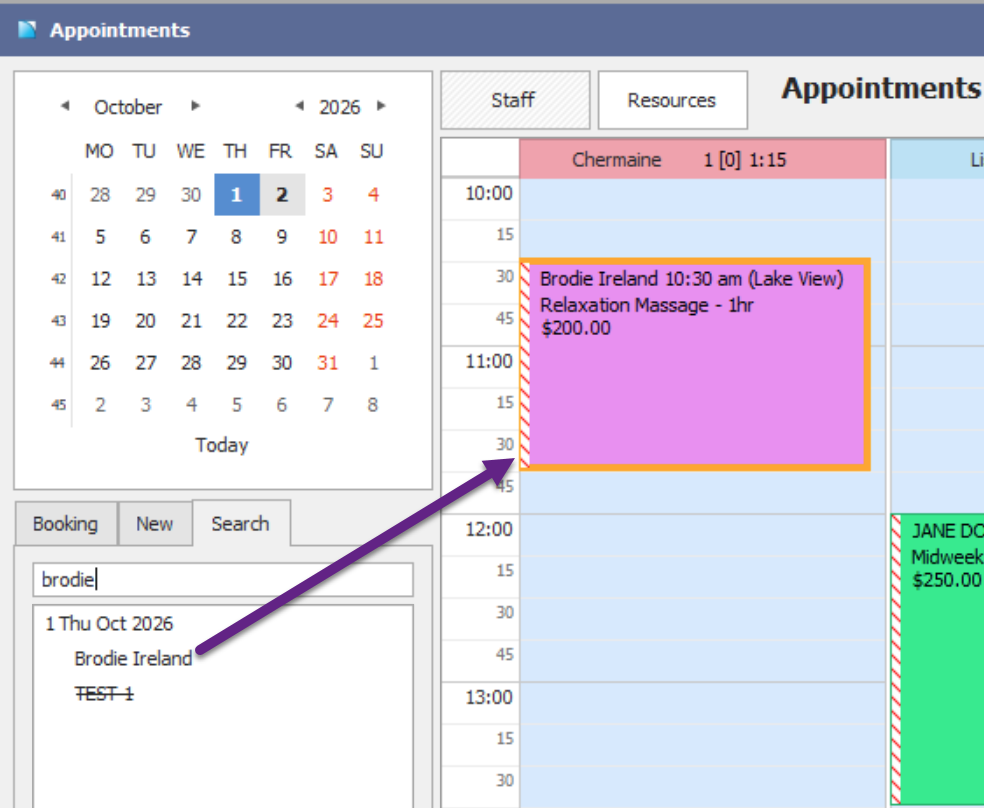
- Click on the Search tab on the bottom left-hand side and search by the customer name, phone or email address.
- All bookings forward of the date specified will appear in the search results and cancelled bookings will appear struck-out.
- Selecting a search result will highlight the booking in orange.
- To search historic bookings, change the date on the Appointments screen to a past date to include results from that period.
View booking details
To quickly view more details about a booking from the Appointments screen:
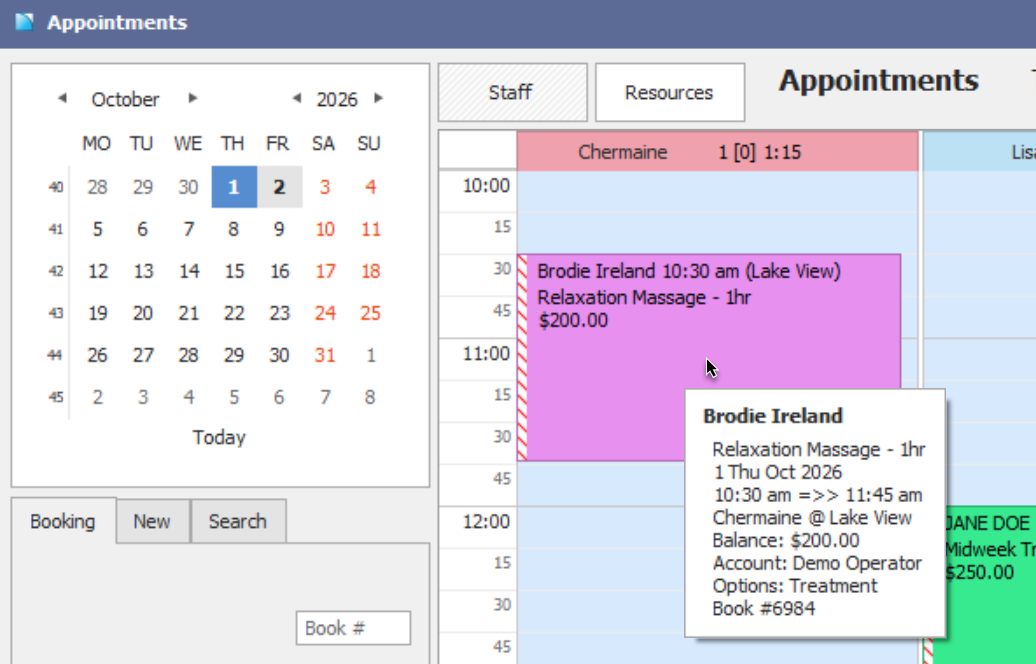
- Hover your mouse over the booking to bring up more information
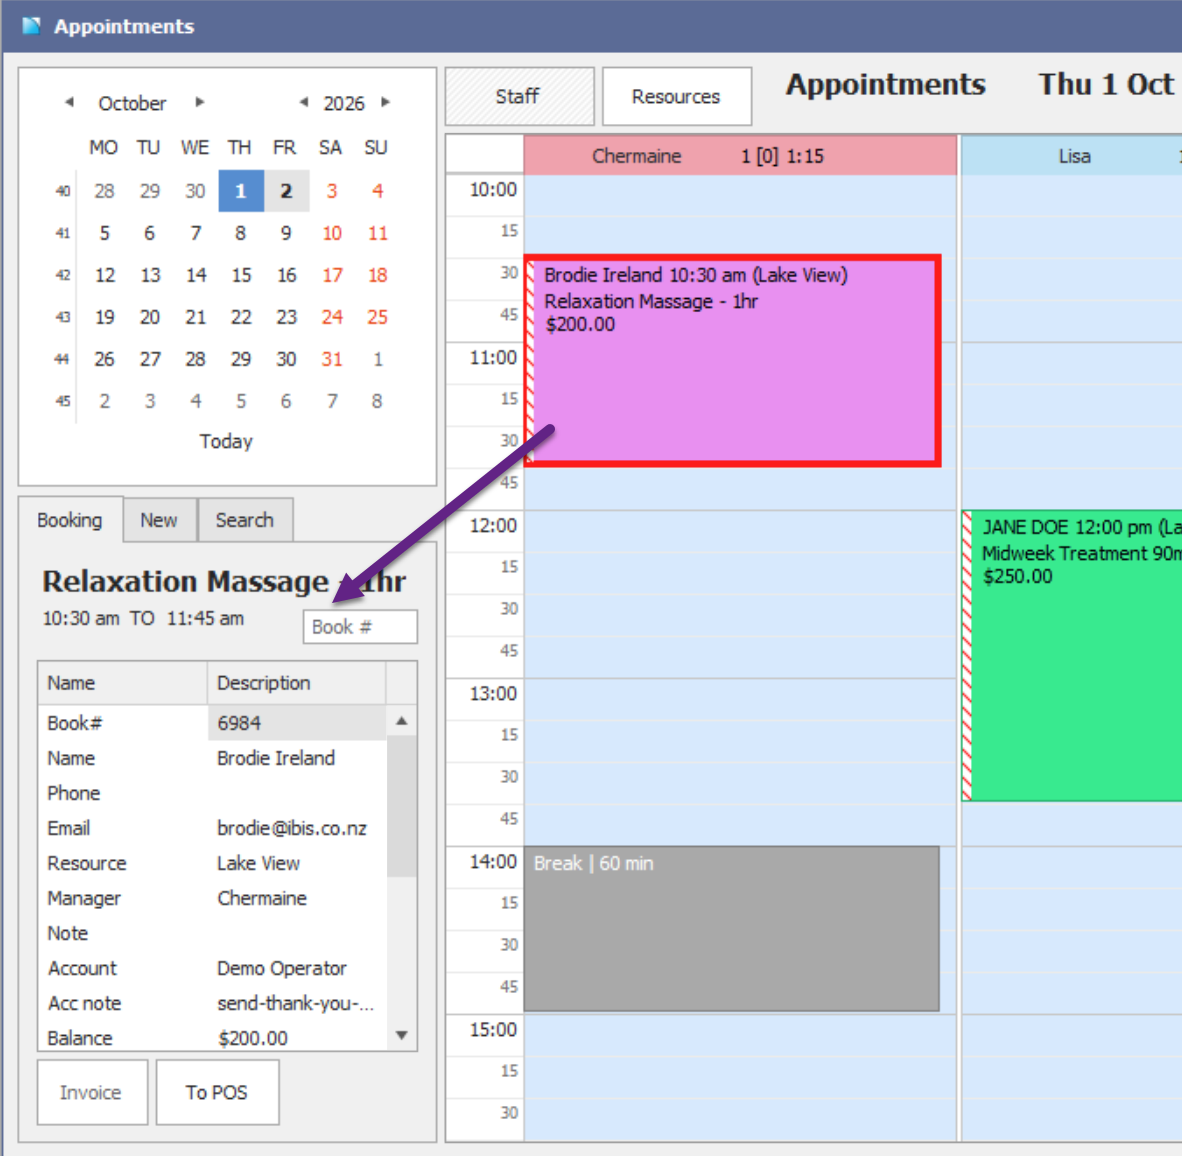
- Single-click the booking to bring up the booking details in the left-hand panel on the Appointments screen.
- Double-click the booking to open the booking in the Itinerary screen.
View cancelled bookings
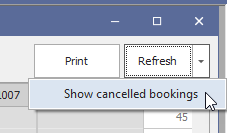
On the Appointments screen, click on the down arrow next to the Refresh button, then select Show cancelled bookings. Click Refresh to revert back to the default to standard view.
Make an appointment booking
Appointment bookings can be made directly from the Appointments screen or via the Appointments tab on the Availability screen.
Make a booking from the Appointments screen
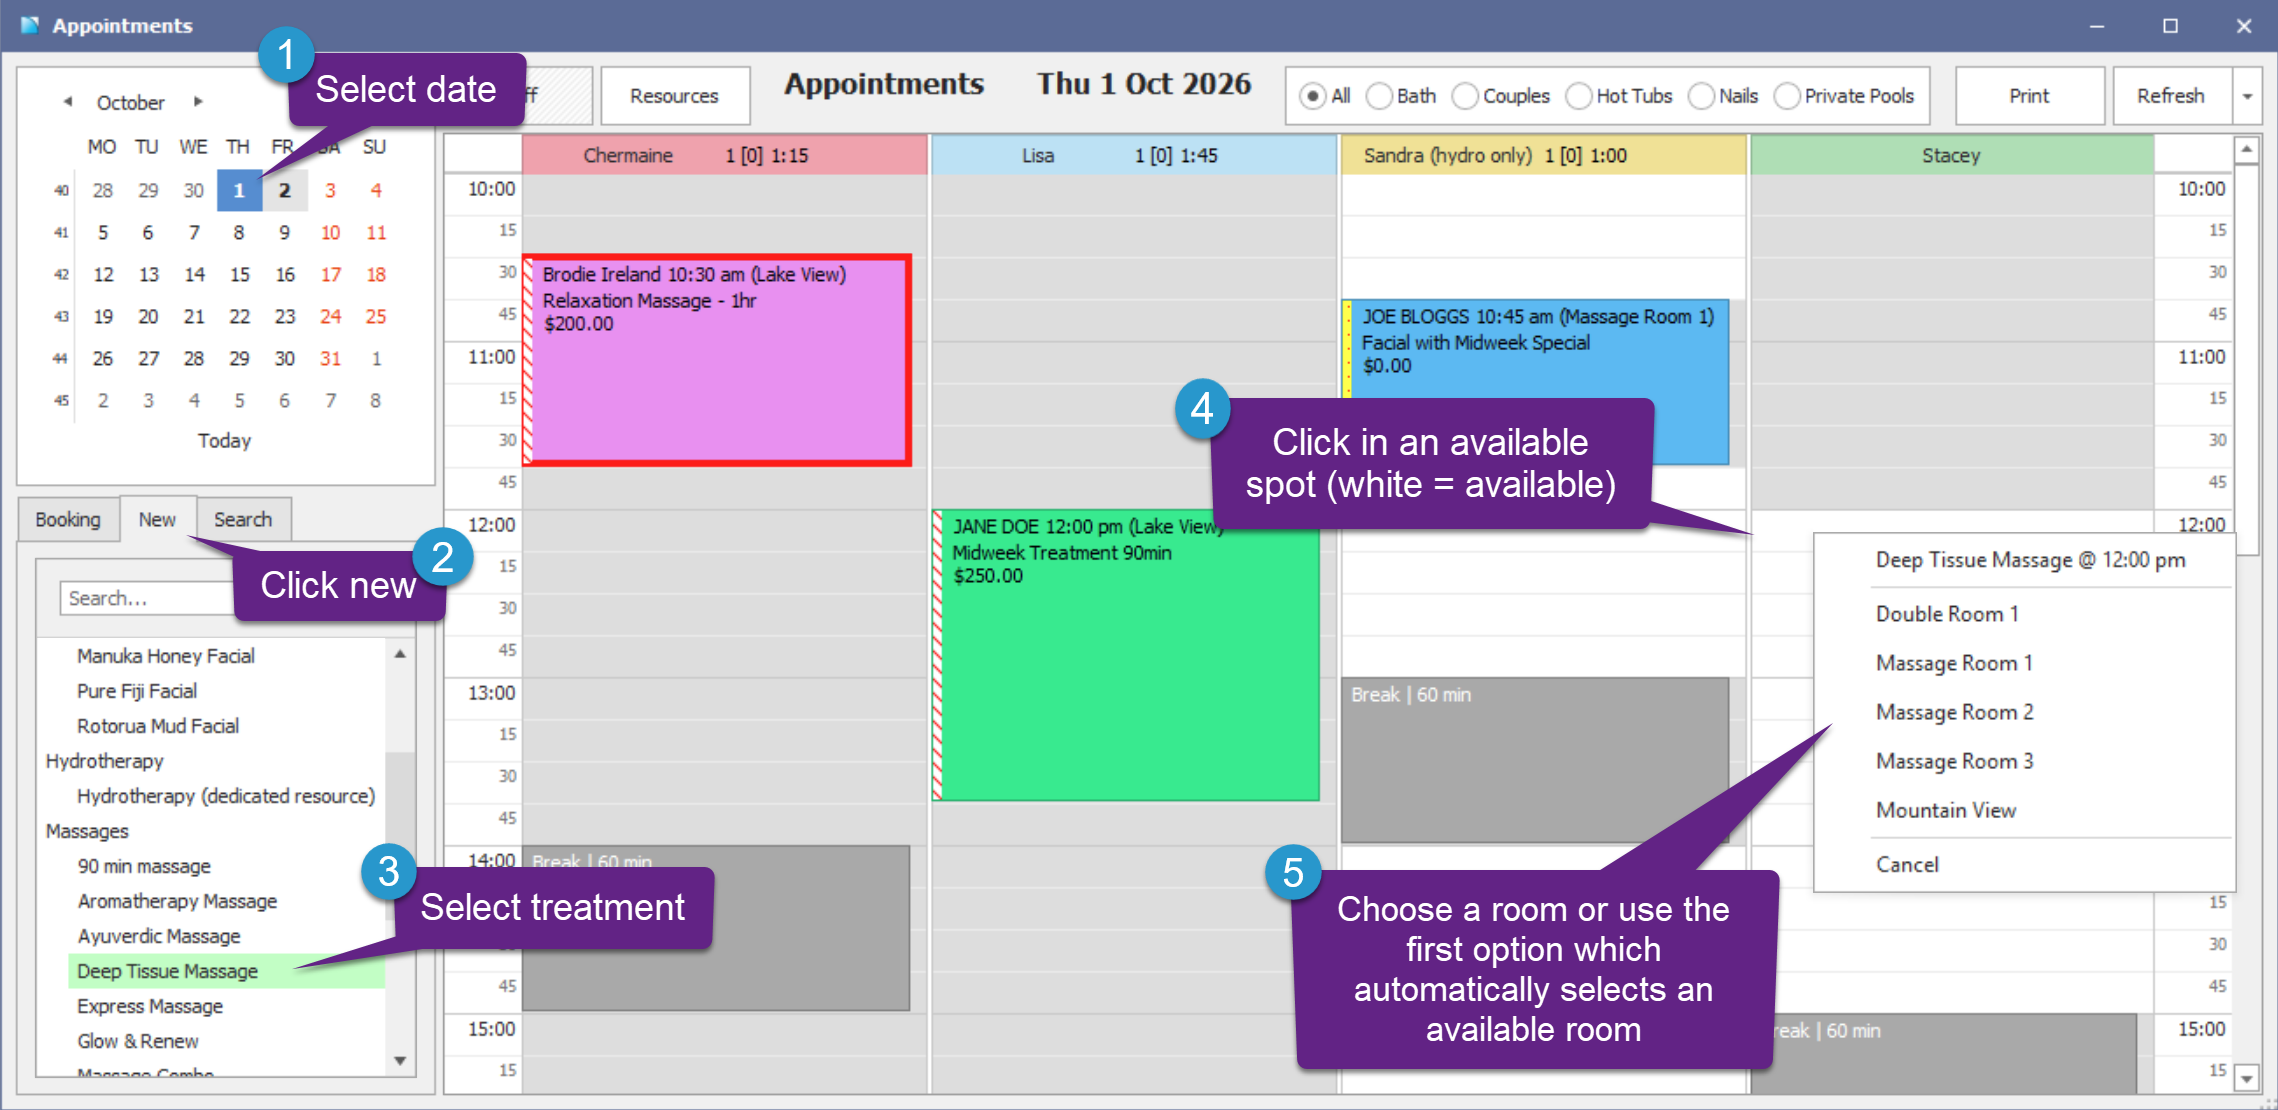
- On the Appointments screen, choose the date you want to make your hire booking.
- Click the New tab in the left-hand panel.
- Select the product you want to book.
- Available timeslots will be displayed in white. Click your preferred available slot.
- Choose your room (resource) preference from the list or click the product/time at the top of the popup to automatically select a room for you to open the Itinerary screen.
- Enter the customer details or search for an existing customer in the Search/Add customer popup.
- The booking will open in the Itinerary screen, where you can finish adding details.
Make a booking from the Availability screen
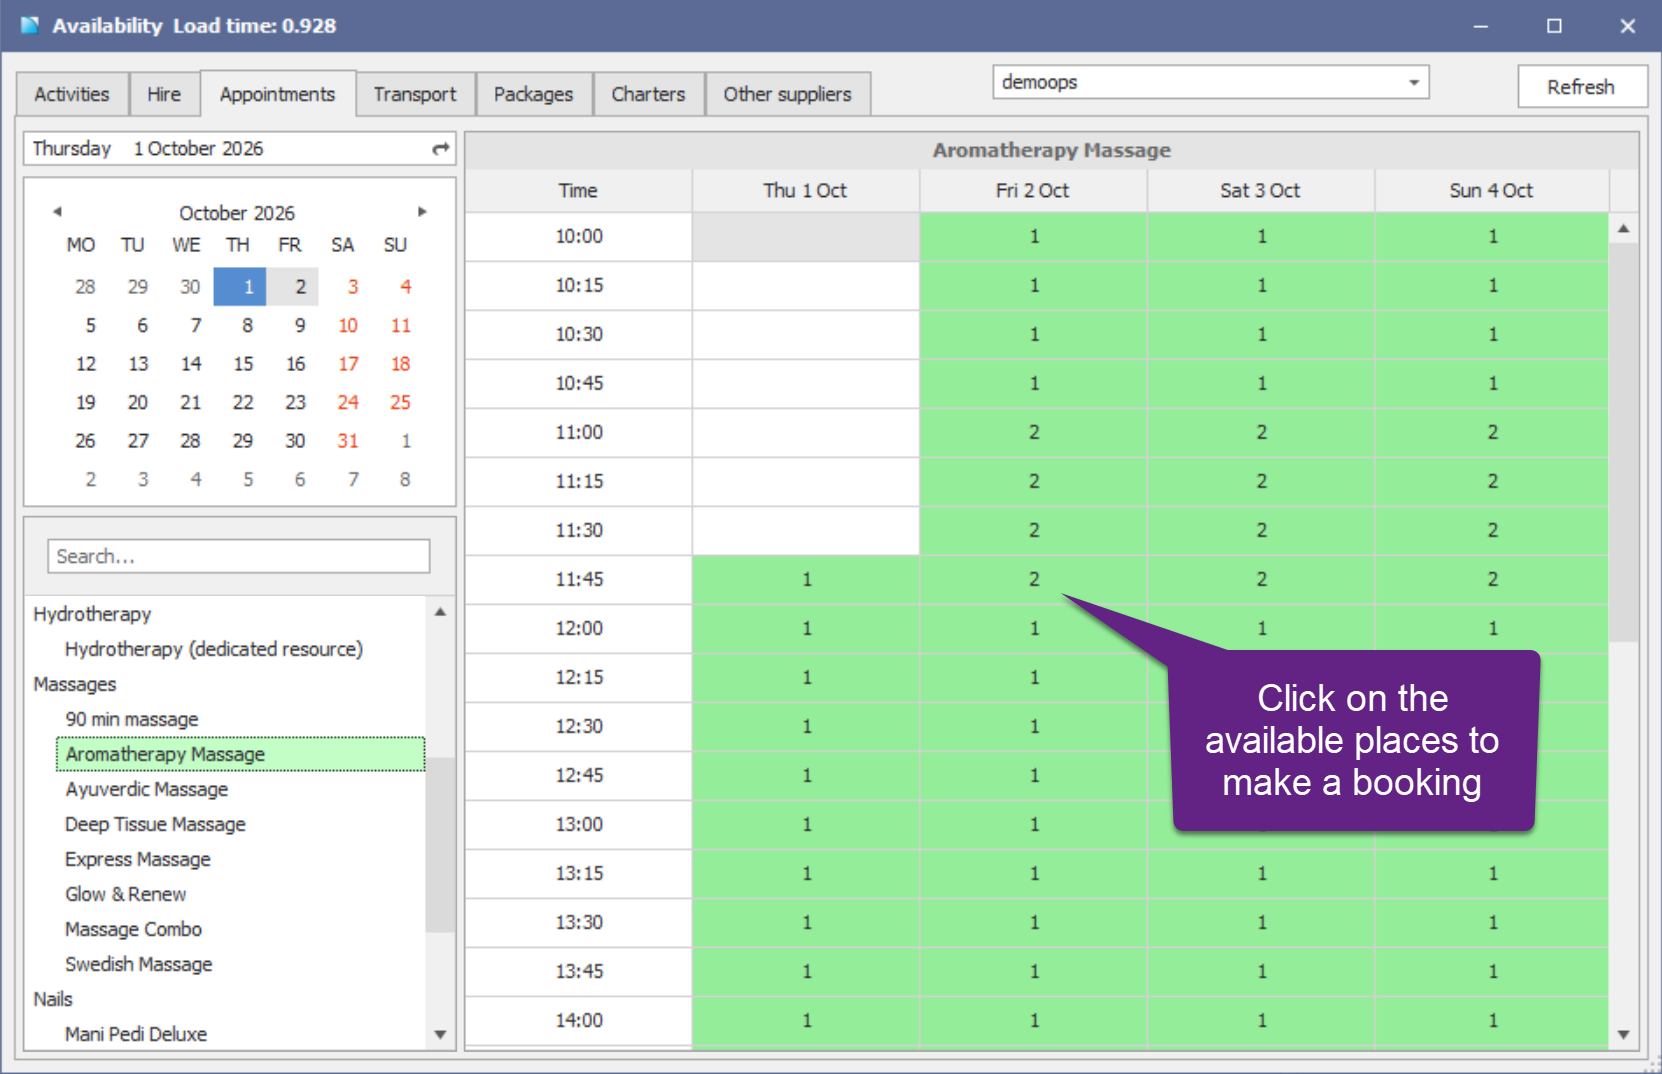
- Open the Availability screen and select the Appointments tab.
- Choose a departure date on the calendar.
- Select the product from the bottom-left list. Available places for each date and time will be displayed on the right.
- Click on a departure time, confirm a new itinerary by selecting Yes, and enter the customer’s name and email.
- The booking will open in the Itinerary screen, where you can finish adding details.
Edit appointment bookings
Change the status of an appointment booking
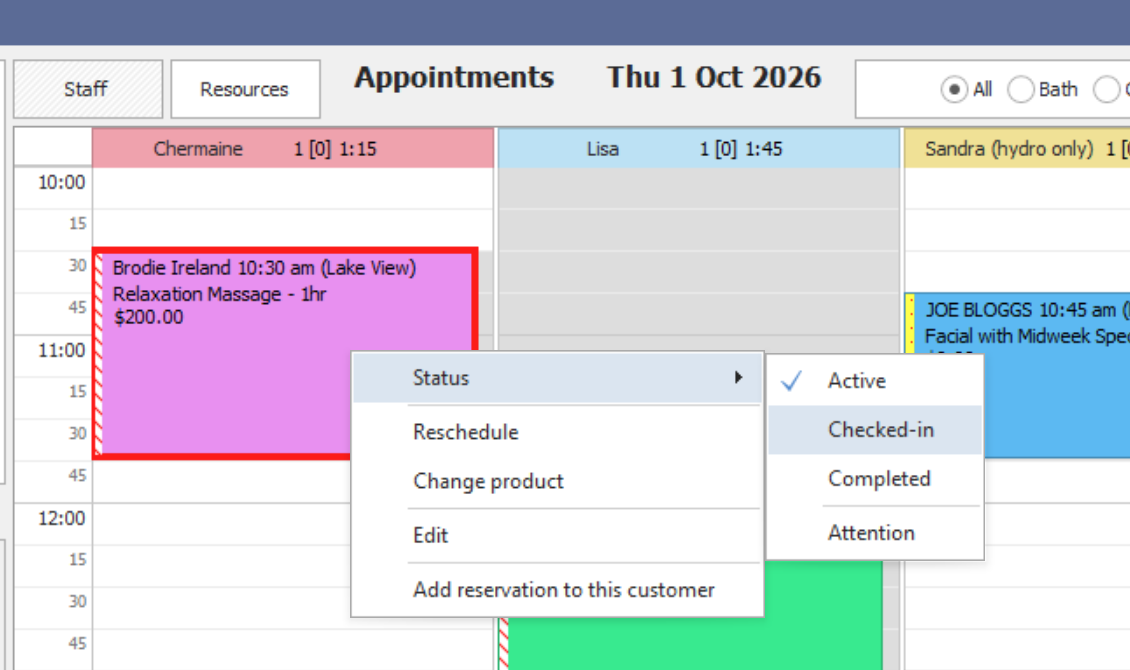
- From the Appointments screen, right-click on the booking and select Status.
- Select from one of the following:
- Active: displays a red and white striped bar on the left-hand side of the booking indicating an outstanding balance.
- Checked-in: displays a person in the top left of the booking
- Completed: displays a green tick in the top left of the booking
- Attention: displays a yellow and red striped bar on the left-hand side of the booking. All appointments made online will have this flag set by default.
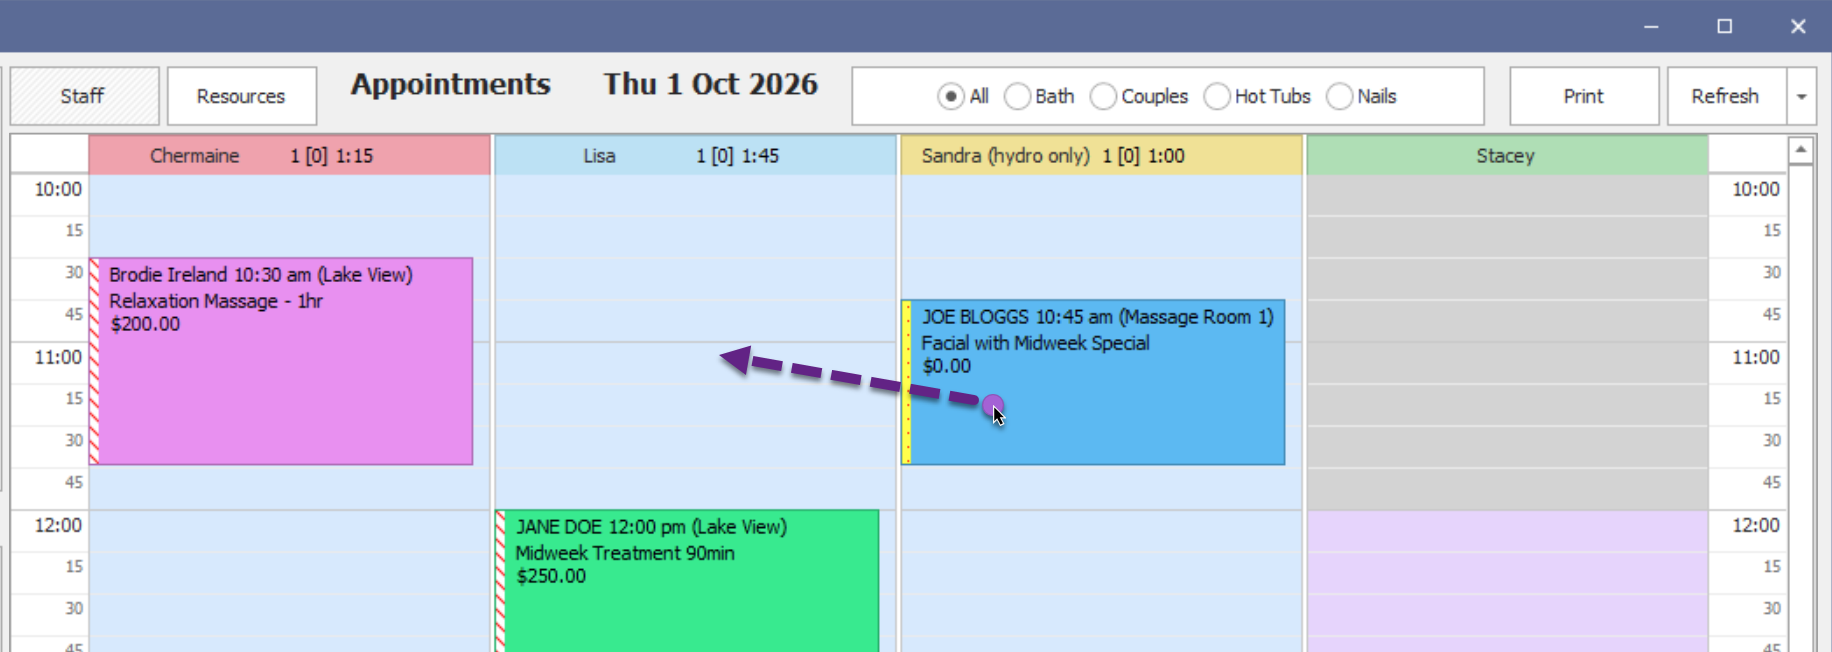
Change the staff member
From the Appointments screen, drag the booking to another staff member.
- From the Appointments screen, change the layout to the Resources view.
- Drag the booking to another room.
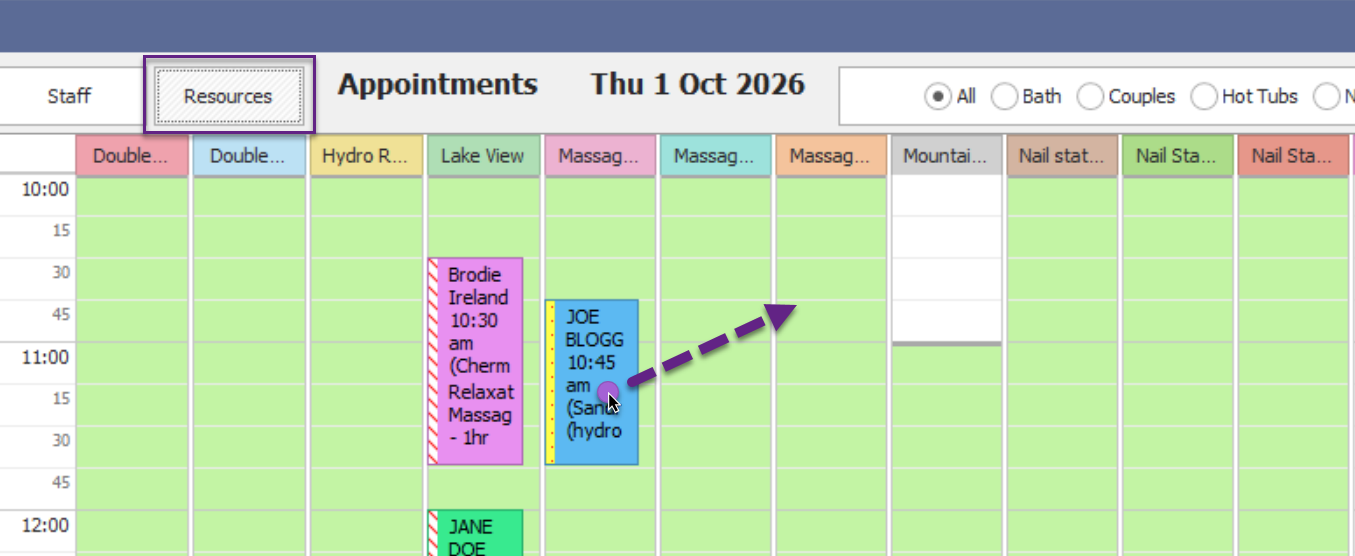
A warning message will appear if your selected therapist or resource is unavailable or a customer is making an online booking for the same therapist or resource at that time.
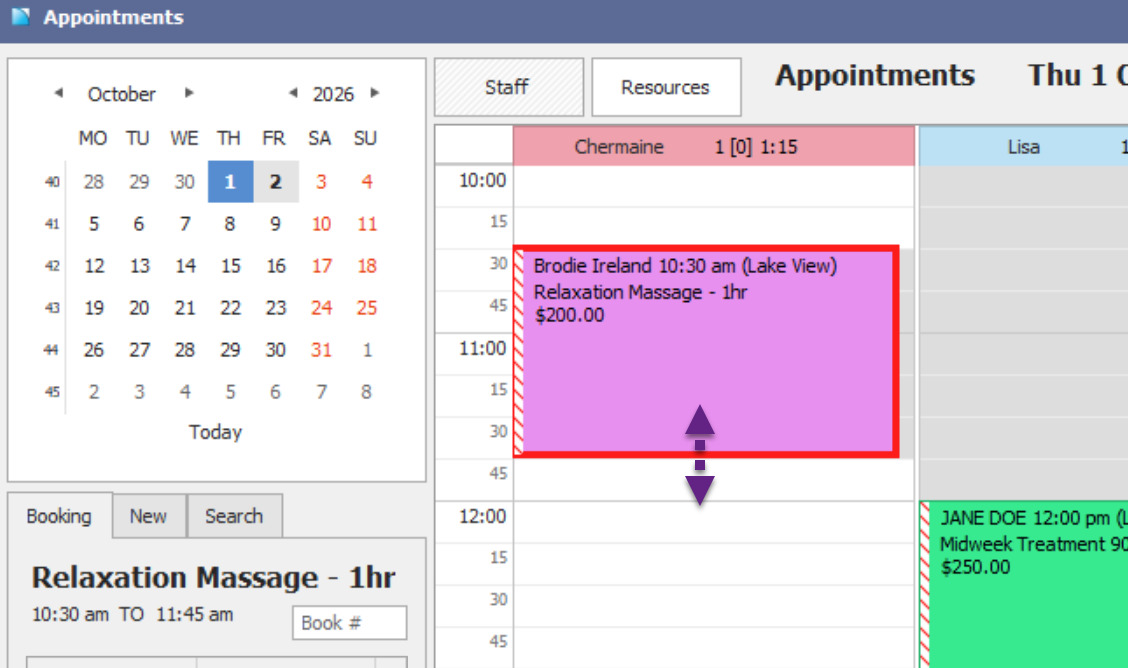
Change the duration of an appointment
Hover your cursor over the top or bottom edge of the booking. Click and hold to drag the edge of the booking to extend or reduce the duration of the appointment.
This can also be used to extend or shorten therapist breaks.
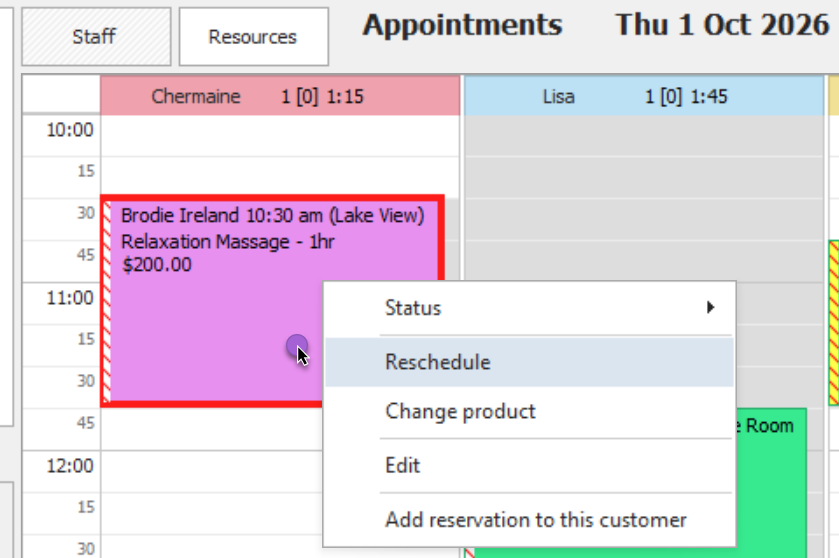
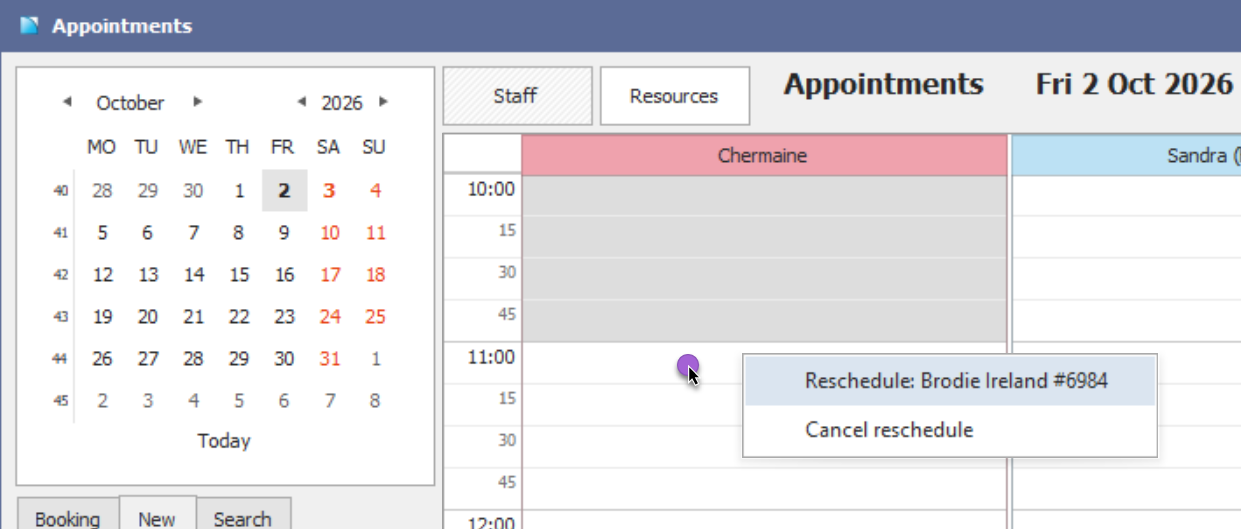
Reschedule to another date & time
- From the Appointments screen, right-click on the booking and click Reschedule.
- Select a new date and time on the calendar.
- Choose an available time-slot on the new date, then right-click again and select Reschedule.
- You will be prompted to confirm the changes. Select Yes to confirm, No to cancel.
Change the product
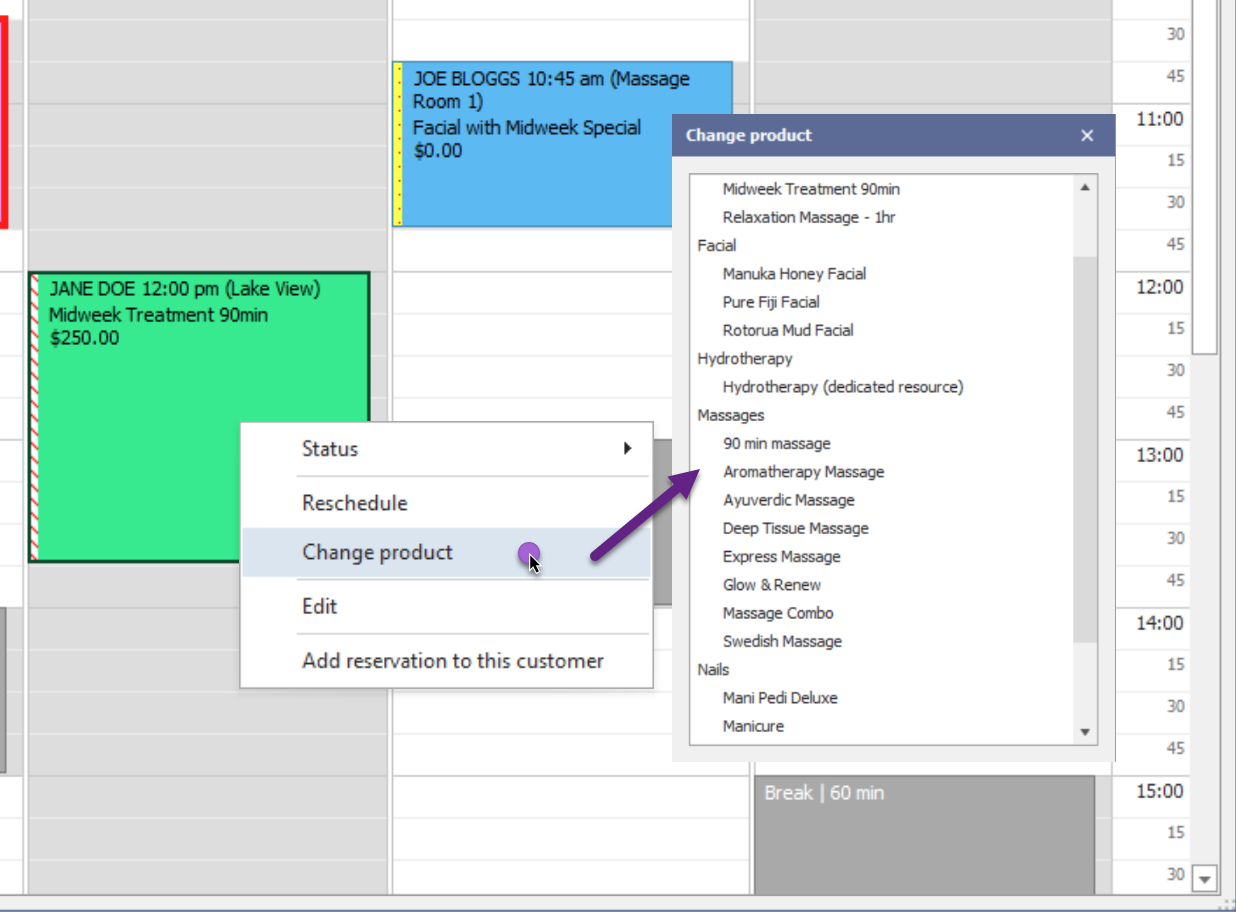
- From the Appointments screen, right-click on the booking and click Change product
- Choose a new product from the menu. The Itinerary screen will open automatically so you can adjust any pricing as required.
- Save the booking to confirm the product change.
Pay for an appointment
Take payment at POS for an appointment
Select the booking in the Appointments screen to bring up the details in the bottom left-hand panel, then click To POS.
Take payment for multiple appointments at the same time
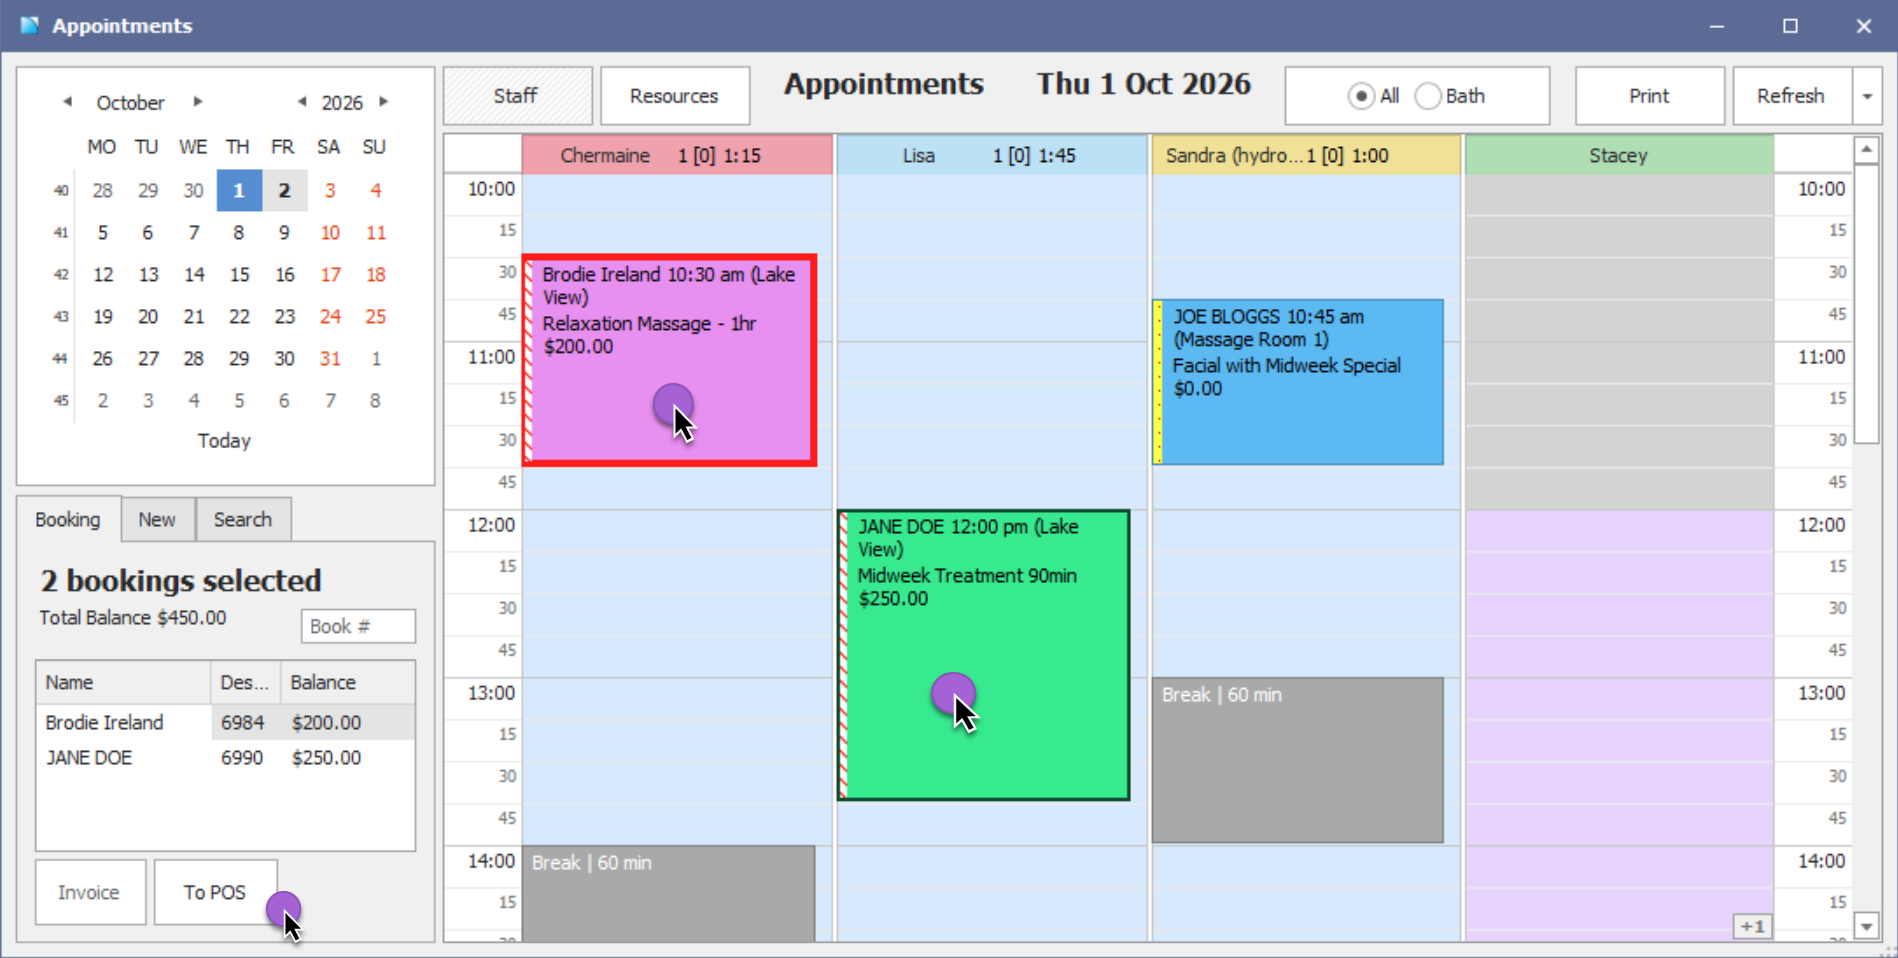
- Select multiple appointments in the Appointments screen by holding CTRL or Shift on your keyboard as you click.
- On the bottom left, you’ll see a summary of the bookings you have selected. To deselect any, click the booking again to exclude it from the list.
- Click the To POS button to take payment for all the selected bookings.
Post an agent booking to invoice
- From the Appointments screen, select the booking so the details appear on the bottom left-hand side of the screen.
- Click Invoice.
- Check invoice details, then click Apply. You can only post one booking to invoice at a time.
