
Hire products in IBIS are reservation-based products that require a resource to be available. Each booking reserves a resource for a specific time-slot and may include multiple people. These products are commonly used for private pools, room hire, and equipment hire bookings where availability is controlled by the resource.
This article covers reservation management functions available in the Hire screen and processes specific to hire bookings. For a broader overview of booking management within the Itinerary screen, refer to the Itinerary Screen Processes article.
TABLE OF CONTENTS
- Overview of the hire screen
- Search for a booking
- View cancelled bookings
- Make a hire booking
- Changing the booking status from the Hire screen
- Changing the time or resource of a Hire booking
- Pay for a hire booking
- Managing bookings with transport
Overview of the hire screen
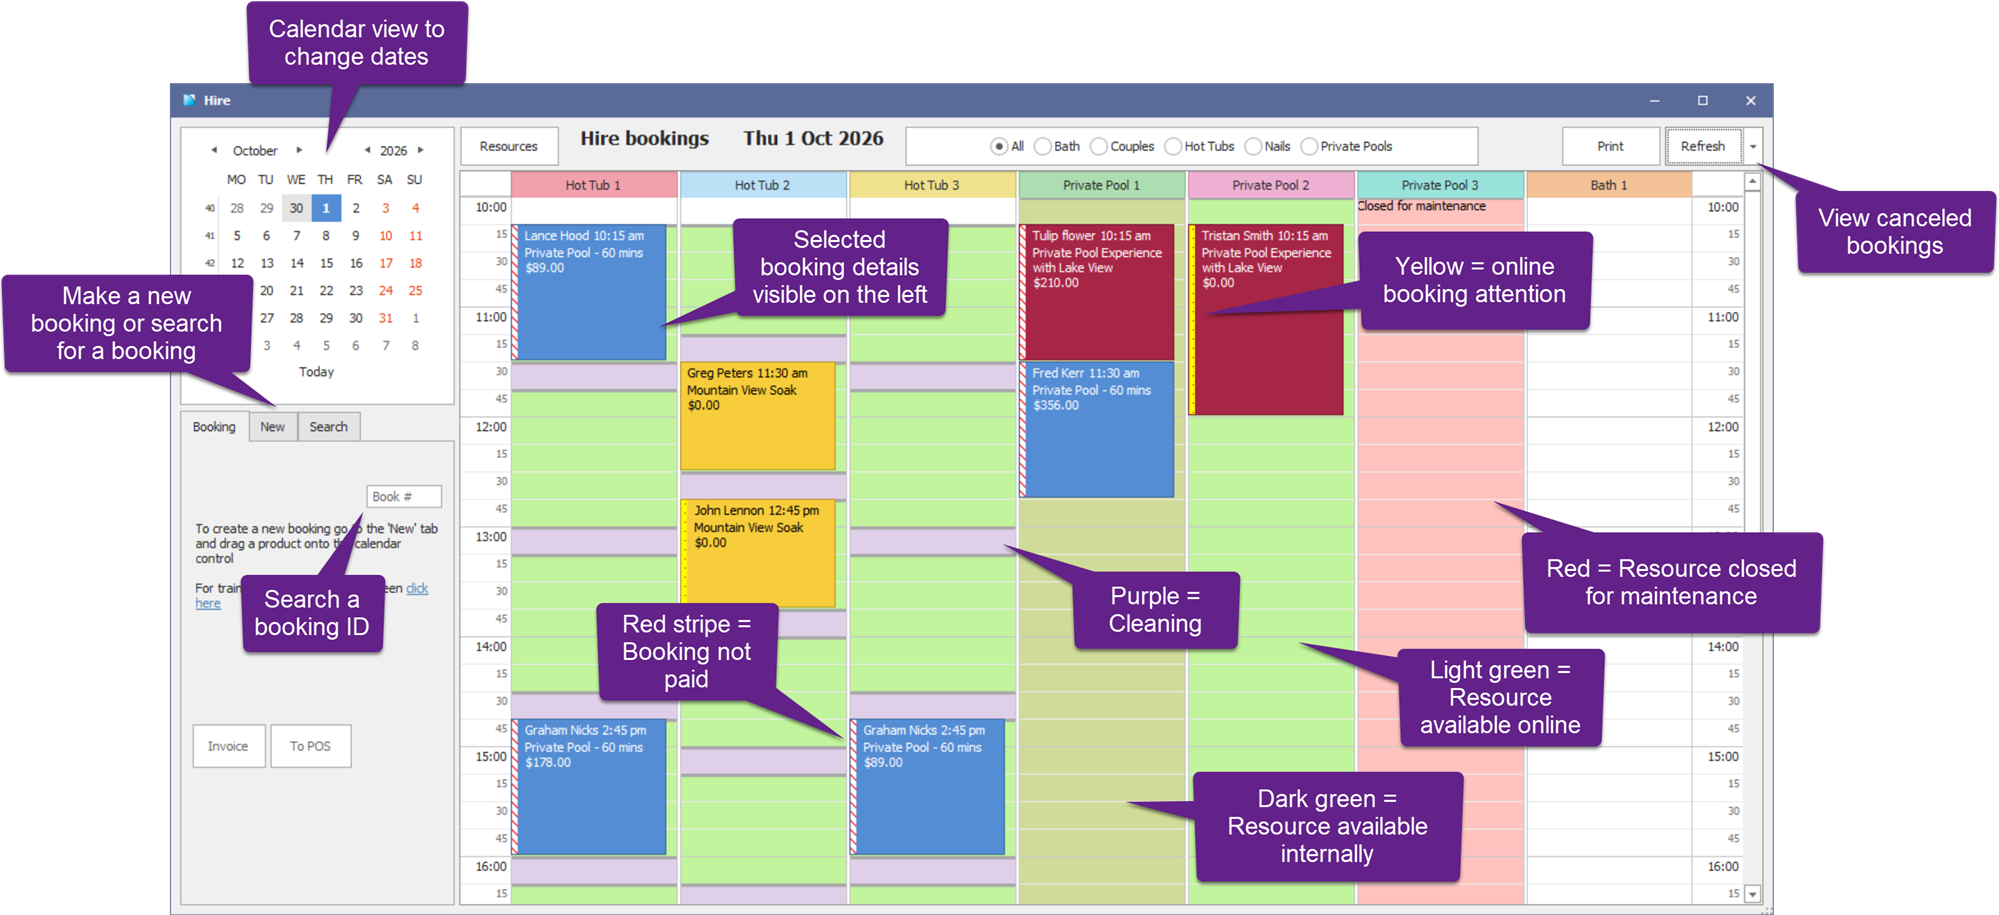
The Hire screen provides an operational overview of your Hire bookings for a selected day. From this screen, you can view resource availability at a glance, make new bookings, and manage existing reservations.
Search for a booking
You can search for a booking in the Hire screen.
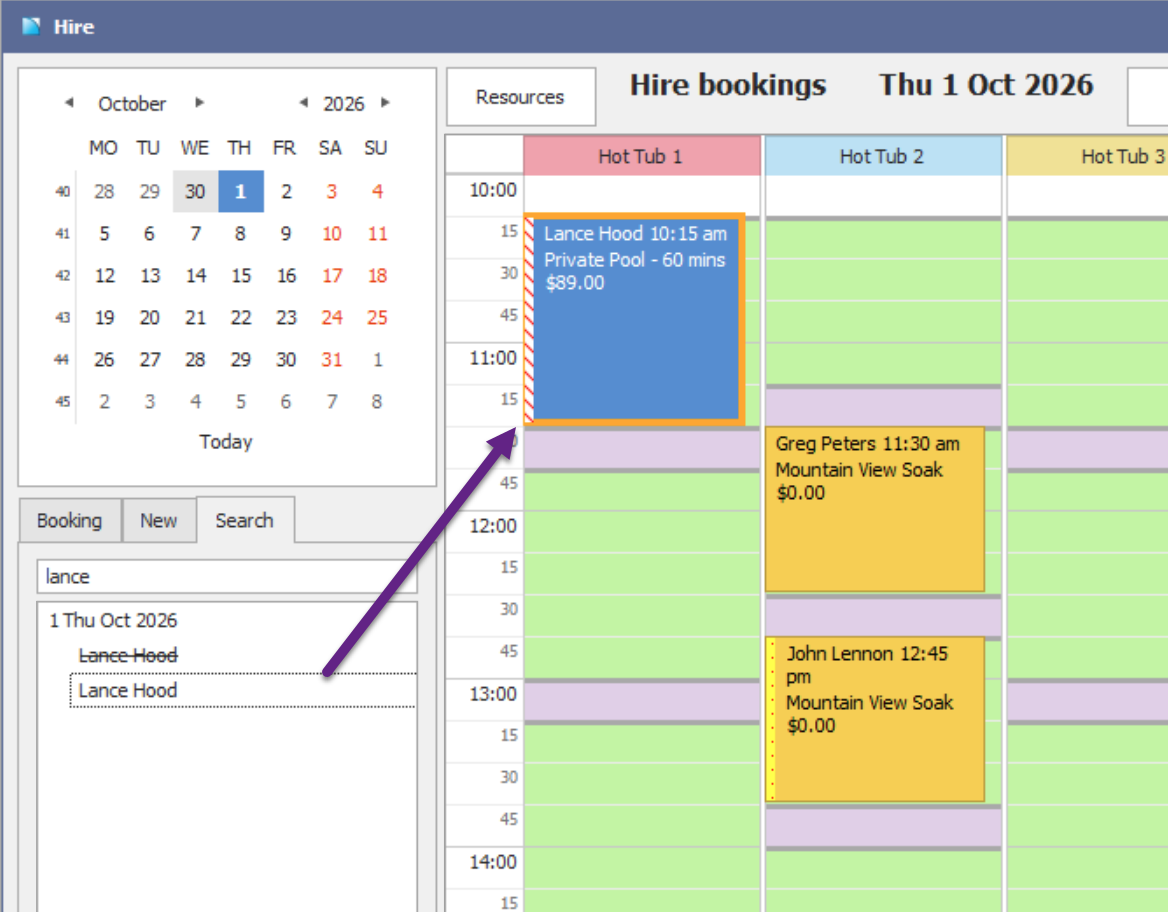
- Click on the Search tab on the bottom left-hand side and search by the customer name, phone or email address.
- All bookings forward of the date specified will appear in the search results and cancelled bookings will appear struck-out.
- Selecting a search result will highlight the booking in orange.
- To search historic bookings, change the date on the Hire screen to a past date to include results from that period.
View cancelled bookings
On the Hire screen, click on the down arrow next to the Refresh button, then select Show cancelled bookings. Click Refresh to revert back to the default to standard view.

Make a hire booking
Hire bookings can be made directly from the Hire screen or via the Hire tab on the Availability screen.
Make a booking from the Hire screen
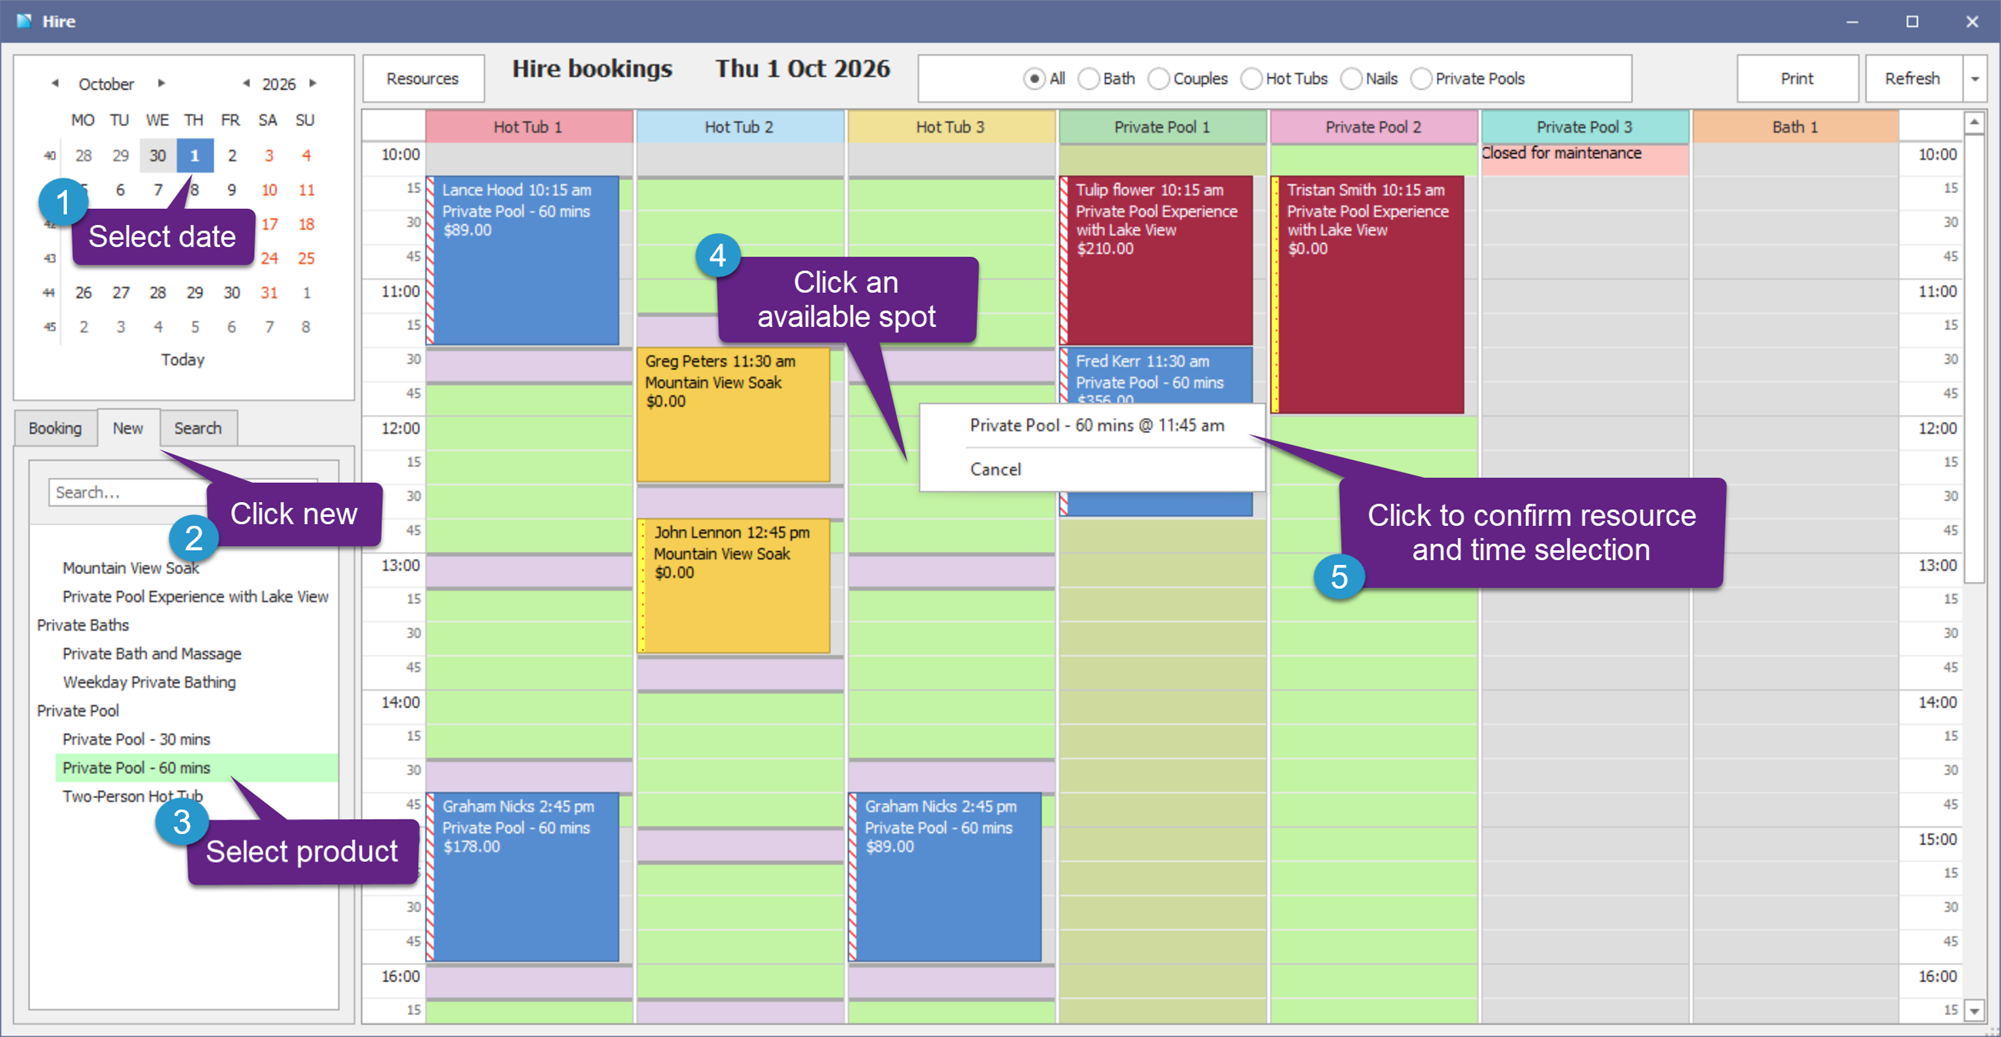
- On the Hire screen, choose the date you want to make your hire booking.
- Click the New tab in the left-hand panel.
- Select the product you want to book.
- Available timeslots will be displayed on the resources. Click your preferred available slot.
- Click the product/time shown at the top of the popup to open the Itinerary screen.
- Enter the customer details or search for an existing customer in the Search/Add customer popup.
- The booking will open in the Itinerary screen, where you can finish adding details.
Make a booking from the Availability screen
- Open the Availability screen and select the Hire tab.
- Choose a departure date on the calendar.
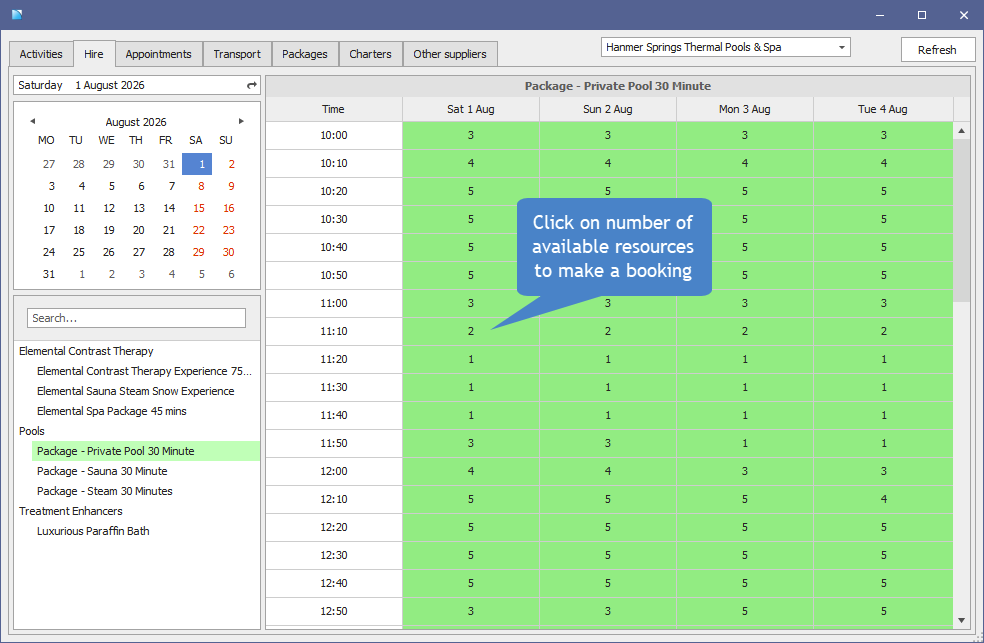
- Select the product from the bottom-left list. Available resources for each date and time will be displayed on the right.
- Click on a departure time, confirm a new itinerary by selecting Yes, and enter the customer’s name and email.
- The booking will open in the Itinerary screen, where you can finish adding details.
Note: if you make a booking for multiple resources at once, then these will be separated out into individual bookings when you click Save. Any addons won't be separated, so it's best to first make the bookings, then add the addons individually as needed
Changing the booking status from the Hire screen
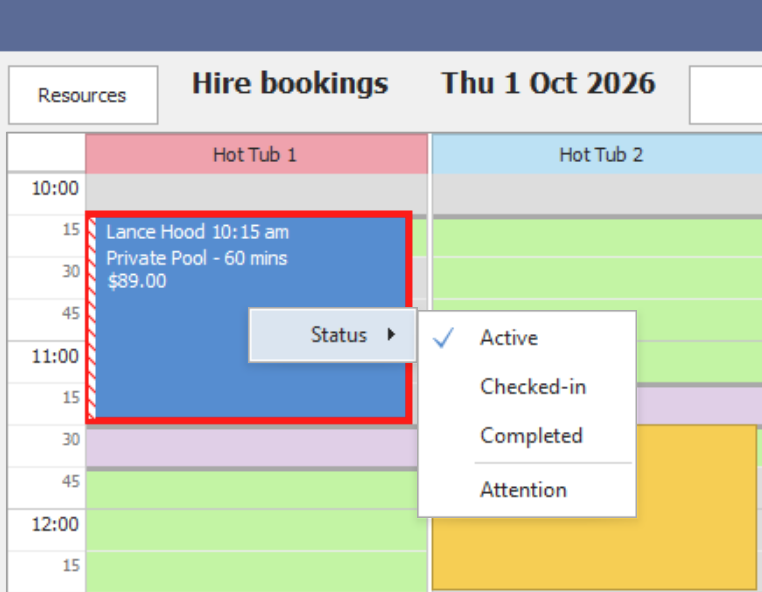
- From the Hire screen, right-click on the booking and select Status.
- Select from one of the following:
- Active: displays a red and white striped bar on the left-hand side of the booking indicating an outstanding balance.
- Checked-in: displays a person in the top left of the booking
- Completed: displays a green tick in the top left of the booking
- Attention: displays a yellow and red striped bar on the left-hand side of the booking. All bookings made online will have this flag set by default.
Changing the time or resource of a Hire booking
Change the time or resource for a booking in the Hire screen
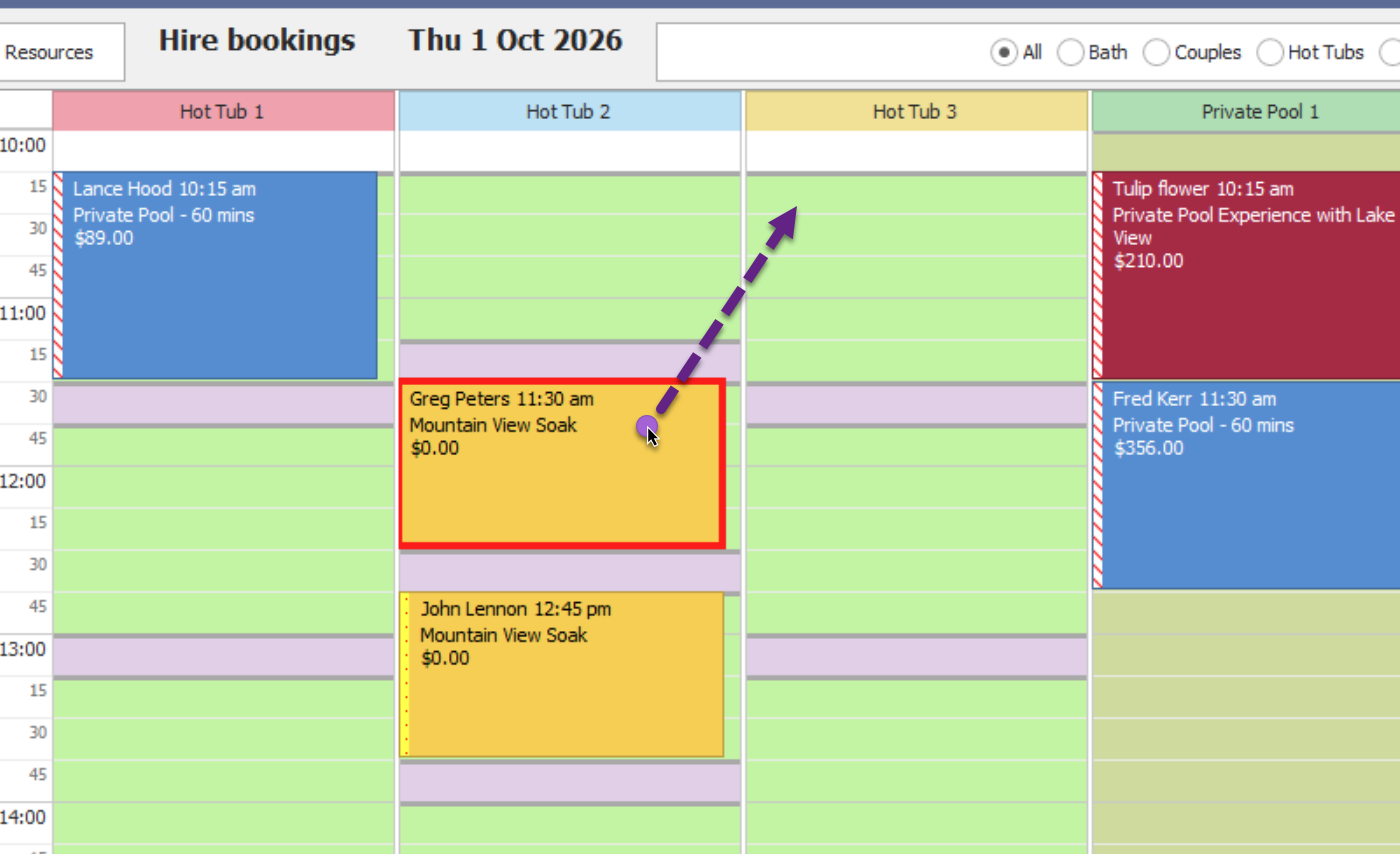
Bookings can be moved to a different time or resource on the same day directly from the Hire screen.
- Click and hold the booking.
- Drag the booking to the required time or resource.
- Release the booking to save the change,
To move multiple bookings at once, hold CTRL on your keyboard and select each booking before dragging them to the new time or resource.
If the selected resource is unavailable, or a customer is making an online booking for the same resource and timeslot, a warning message will appear.
Note: To reschedule to a different day, please follow the reschedule process outlined in the Itinerary Screen Processes article.
Change the resource in the Itinerary screen
Resources can also be reassigned from within the booking.
- Open the booking in the Itinerary screen.
- Click Edit.
- Available resources for the same time will be displayed.
- Remove the units from the current resource and select units against the new resource.
- Save the booking.
Add-ons remain attached to the original resource when a booking is moved this way. If your hireproducts use add-ons, we recommend changing the resource and saving the booking first, then re-opening the booking and re-adding any required add-ons to the new resource.
Pay for a hire booking
Take payment at POS for a booking
Select the booking in the Hire screen to bring up the details in the bottom left-hand panel, then click To POS.
Take payment for multiple bookings at the same time
- Select multiple bookings in the Hire screen by holding CTRL or Shift on your keyboard as you click.
- On the bottom left, you’ll see a summary of the bookings you have selected. To deselect any, click the booking again to exclude it from the list.
- Click the To POS button to take payment for all the selected bookings.

Post an agent booking to invoice
- From the Hire screen, select the booking so the details appear on the bottom left-hand side of the screen
- Click Invoice.
- Check invoice details, then click Apply. You can only post one booking to invoice at a time.

Managing bookings with transport
If your Hire product includes a transport service, transport can be booked when making a reservation through the Availability screen.
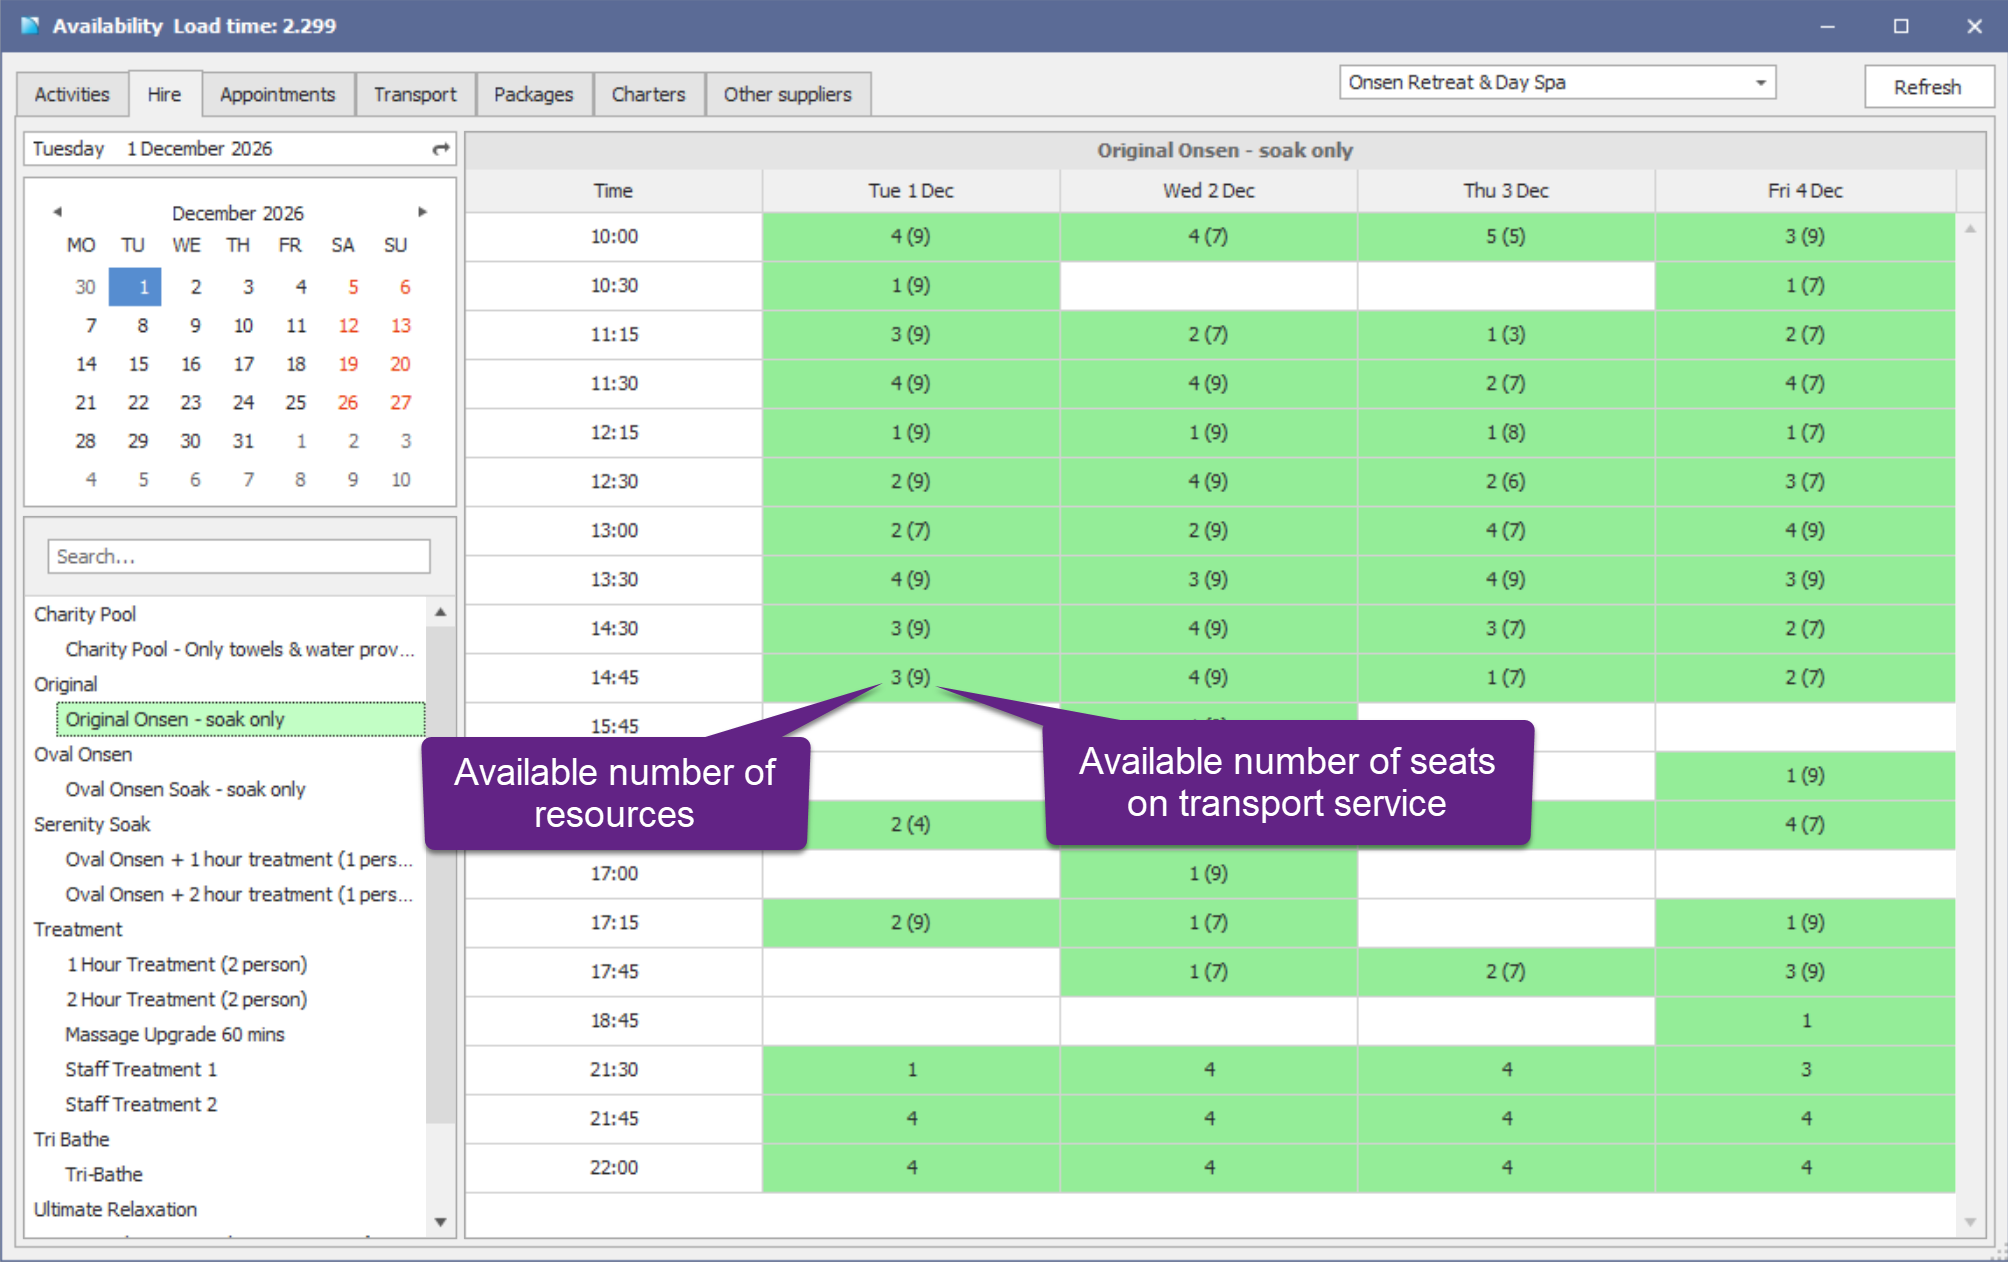
The number of available transport seats is displayed in brackets alongside the number of available resources. If no transport seats are available, the bracketed transport availability will no longer be displayed.
Make a booking with transport
To include transport when making a booking:
- Open the Availability screen and select the Hire tab.
- Choose a departure date on the calendar.
- Select the product from the bottom-left list. Available resources for each date and time will be displayed on the right.
- Click on a departure time, confirm a new itinerary by selecting Yes, and enter the customer’s name and email.
- The booking will open in the Itinerary screen. Enter the number of units for the resource. The same number of places on the transport will be reserved.
- To confirm transport, select a Pickup and Dropoff location from the dropdowns in the booking. If Self Drive is selected as the Pickup location and Own Transport is selected as the Dropoff location, no transport booking will be created.
Add or remove transport from an existing booking
If a customer wants to change their transport arrangements after the booking has been made:
- Add transport: Select a Pickup and Dropoff location from the dropdowns on the booking.
- Remove transport: Change the Pickup and Dropoff locations to Self Drive and Own Transport. This will release the reserved transport seats.
You can use the Pickup/Dropoff manifest in IBIS Online to generate a passenger manifest for your transport driver.