TABLE OF CONTENTS
- Set up thermal receipt printing on your device
- Customise receipt footer message
- Email/A4 receipt printing
- Set up/amend the company contact details on your receipts
- Create a promotional receipt
- Print duplicate receipts
Set up thermal receipt printing on your device
IBIS Point of sale was designed to be used with a thermal printer. You can control your thermal receipt printing options from the Machine settings screen. Each device can be configured to either never print a receipt, always print a receipt, or prompt the user to select from the following options:

To configure the receipt printer and printing settings follow these steps:
- Open the Machine settings screen under the System menu.
- Under the Printing section, select the Receipt printer you want to associate with your device.
- Choose the Receipt printing options you want to associate with the device.
- Save your changes.

If you are working from a back office location and do not have a thermal printer, you can set your thermal receipt printer to "Thermal.txt" by selecting this option in your menu (the file location will depend on where IBIS has been installed on your device).
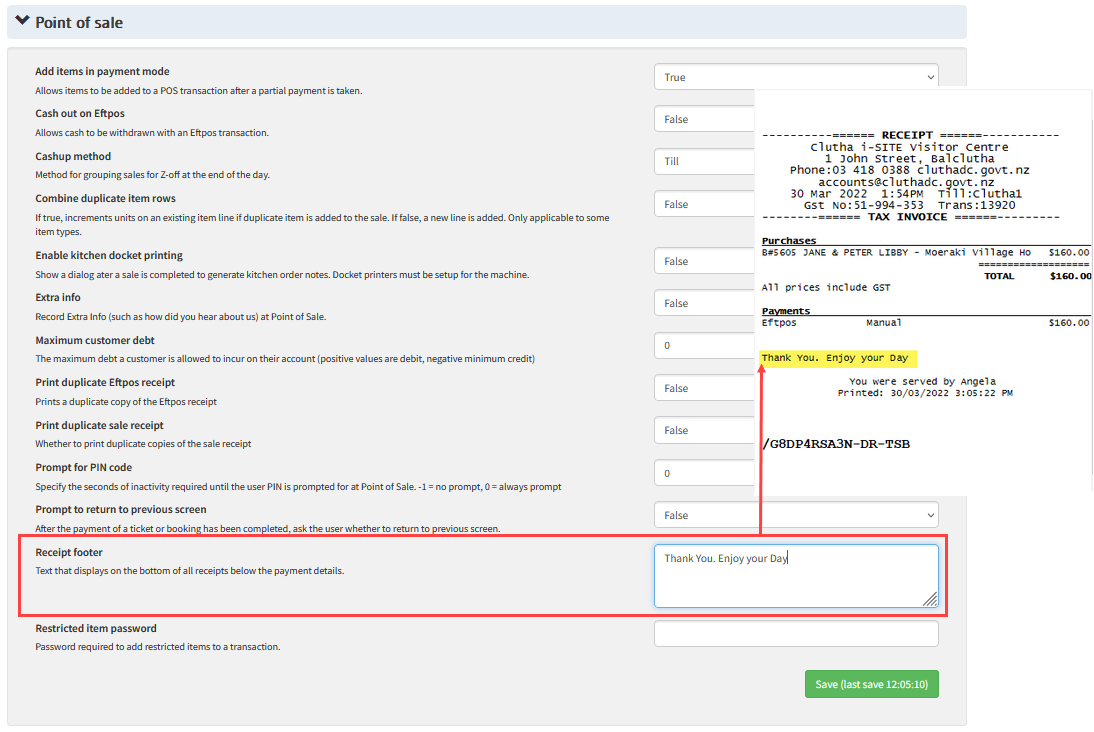
Customise receipt footer message
You can customise the message that prints on the bottom of your receipts in the System settings screen. This message will update the message display on both the thermal text receipt and email receipt.
Email/A4 receipt printing
If you do not have a thermal printer, it is possible to print a receipt to an A4 printer or email the customer a receipt. If you prefer to print to A4, we recommend that you have the A4 printer set as the default Windows printer on your device as this will save the user from having to select the printer each time.
Our recommended set-up is to enable the Machine setting 'Prompt for receipt' so users can select the Email receipt button after a sale is complete. This will launch the Emailer screen displaying the receipt details for the current POS transaction. From here, the user can select to either print OR email the customer's receipt.
If you do not want to prompt the user after each sale, you can add the Email/Print receipt function button to your POS menu (see Customise the Point of sale screen) so they can select the option themselves.
Set up/amend the company contact details on your receipts
The contact details associated with a location will display on receipts printed at Point of sale. To amend any contact details, you must check which contact is associated with the location, and then you can edit the contact information in the Contacts screen.
To amend the GST number that displays on your receipts and invoices, you must do this in your System settings.

Create a promotional receipt
To add promotional receipt details that print after the normal receipt prints (appends to the bottom or as a separate receipt), follow these steps:
- Configure your promo receipt text. This must be in HTML format.
You can customise your font formatting using the following commands:Font Characters to fit width H1 10 H1 small 14 H3 14 H3 small 18 H5 H5 small 28 Normal 42 Small 56 Bold Double weight Strong Currently same as Bold Underline Underlines the text <br /> Line break <p> Paragraph Non-breaking space. E.g.: <H3>We'd love your feedback</H3>
<p><small>Go to our website xxx.yyy.com and enter this code:<br />
<strong>XCEAGEF</strong></p>
<p><small>Give us your feedback and you<br />
will be entered into our draw to win<br>
great prizes.</small></p>
<p><small>For terms and conditions visit: <br />
https://yourterms.yoursite.com<br />
</small></p>
-----------------------------------------<!-- CUT --> If you want there to be a cut between the normal POS receipt and the promo receipt, then put as the first HTML command. - In the Location screen, paste your HTML into the Promo receipt field
- Enable the setting Print promo receipt then save your changes.
- To test, use the Reprint receipt function at POS to see how it looks.
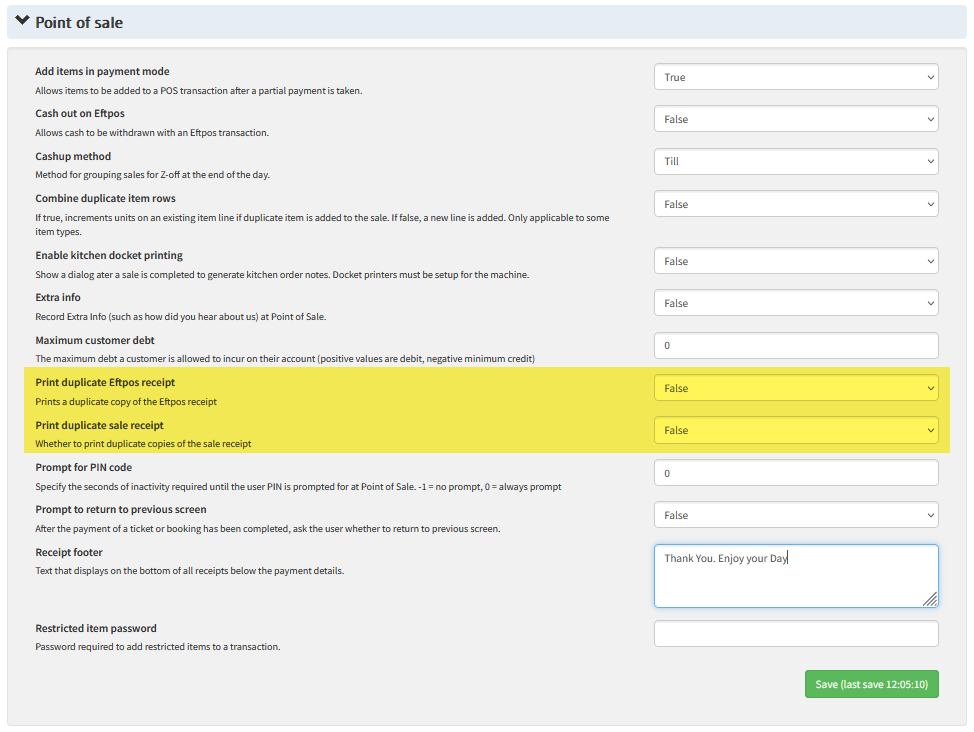
Print duplicate receipts
You can enable duplicate receipt printing for both sales and EFTPOS receipts (Integrated EFTPOS customers only).
- To enable duplicate receipt printing, open the System settings screen under the System menu.
- Under the Point of sale section, you will find the Print duplicate Sale/Eftpos receipt settings.
- Enable or disable as required and Save your changes.
If you are trying to disable duplicate receipt printing and you have checked the System settings is false, it may be that your Windcave EFTPOS software is also set up to print a receipt. In all cases, this setting should not be active as the printing is handled by the Point of Sale. To check this setting, browse to C:\Program files\Windcave\Eftpos_scr\pxscrcontroller_cfg. Open this file in a text editor (Notepad) and then locate the following setting and change to '0':<EnablePrint>0</EnablePrint>